Making Halloween Bags

Untitled

Halloween is one of my favorite times of the year. To me, it’s all about the children and just having fun in costume, being anything that you ever wanted to be. It’s the one night where we give “license” to kids and adults alike such that we can play a different role – be scared, and scare others for a laugh. It’s a night where it’s okay to “not be happy” all the time, and where it is encouraged to go up and talk to strangers and say “trick or treat”.

For me, I tend to go a bit “overboard” according to my neighbors. You see, rather than just opening the door and giving out candy, I dress up, plan weeks in advance, buy bulk candy, toys, pencils, erasers, and mini activity books and then buy a bunch of white paper “goodie” bags to give out to the little ghosts and ghouls. I find that the “goodie bag” concept lets me do a few important things:

a) Keep track of how many trick or treaters I’ve had (I know how many bags I made… and how much they cost).
b) Figure out what the cost is and how much I may need for the next year
c) Each bag is hand decorated – but also has my info on them. Parents have mentioned that they like this because it’s memorable and they feel more comfortable if their children want to have some candy while they’re out trick or treating.
d) The children are delighted because it’s a “surprise” in the package. Also, because it’s not just candy – it’s pencils, erasers, and so on, they have something they can take to school or enjoy far beyond the 2 minutes candy might take them to eat.

Most years, I opt for goodies Oriental Trading Company as they have great bulk options for candy, bulk pencils, halloween themed erasers and so on. I try to figure about 0.30- 0.50 per bag, and most years actually end up just under this because the bulk items really are cheaper.

This year, as I’m in Ireland, I bought the candy at the local 1 euro store, and got the goodies off of both eBay and two Irish party stores. The paper goodie bags are bought 50 to a pack for about 2 euros. This year, I bought 2 packages of 100, and then spent 2 evenings after dinner (about 4 hours total) decorating them with my permanent markers.

This could be done by yourself or your children to get them into the spirit. Some ideas that were quick and simple to whip up:

Written words:

Happy Halloween
Boo
Trick or Treat
Spooky
Scary
Frightened Yet
“scaredy cats”
Candy,Candy,Candy
Pirate’s Loot
Magic

Some drawing ideas:
Ghost
Cemetery
Black Cats
Bats
Wolf howling
Moon
Witches Hat
Wizard’s Hat
Witches Calderon
Broom
Pumpkins
Jack o Lanterns
Candy Bag
Voodoo Doll
Frankenstein’s Monster
Mad Scientist
Bride of Frankenstein
Pirate
Skull & Cross Bones
Treasure Chest
Zombies

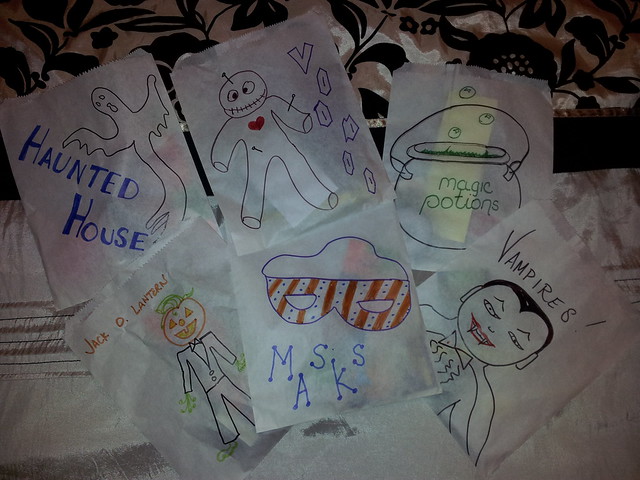
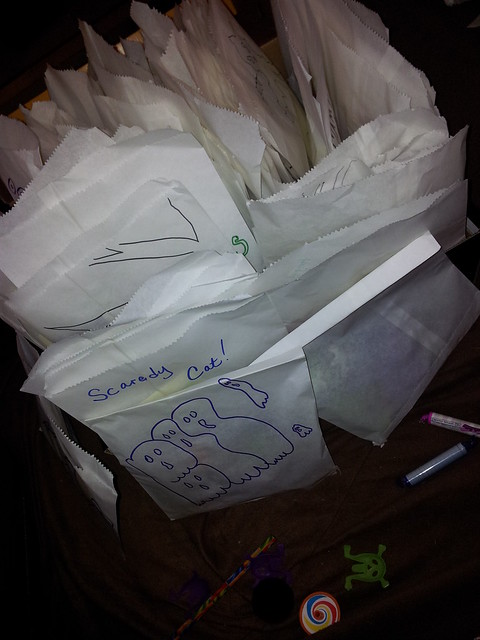
I ended up with about 2 designs of each, and some were better than others. The key here is that the kids don’t expect them to be perfect but if they can get the “idea” they’re happy. If you’re not drawing inclined, I’m sure there are templates online, and also you can see what I’ve done example wise from the pictures. Once all the bags are completed, have a “fill” party. I put in 2 pieces of candy, a pencil, an eraser and one of either sticker, fake tattoo, halloween game or halloween puzzle book. I then fold down the top of the bags and stand them up in a box near the door. This makes for easy handing out to trick or treaters when the time comes.
Untitled

Share

Tea Towel Aprons

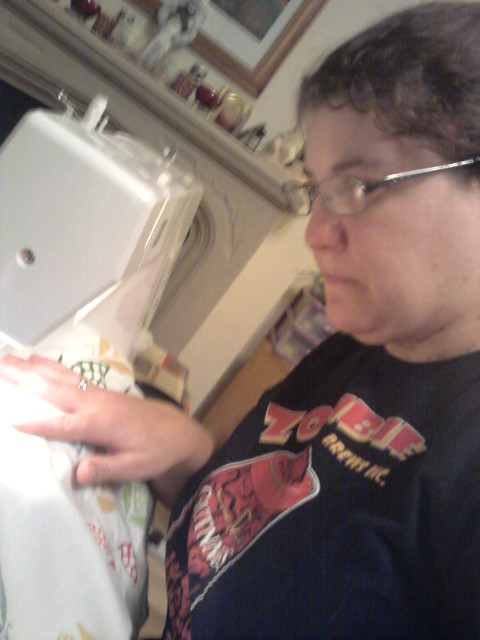
Not so long ago, I took a class for sewing. I did enjoy the class, and after checking a few of the local advertising websites, I found someone who no longer needed their machine and I bought one for 50 Euros. Since then, I have been working hard to make “friends” with it.

I’ve hemmed up a couple pairs of trousers, and then I started looking online for some simple ideas for beginning users of sewing machines. One of these was to make tea towel aprons. The great thing about the idea is that I already had a few adorable “corn” themed tea towels (a set of 3) which I had gotten from Ikea earlier and had been saving as my “good” towels. Well, I thought, I hadn’t used them because I adored the fabric pattern – and I didn’t want to get them dirty or stained. This was the perfect chance to convert them into something that I would actually use, practice my sewing, and which would also end up in the corner of my kitchen – instead of hidden in the drawer.

For this project, you need 3 tea towels to make 2 aprons, some binding or ribbon for straps (I used 1 meter & 1/2 per apron or 3 meters total). (Since doing this, I have discovered there is an easier way – but this is how I made mine).

Step 1: Ironing the aprons. I had to iron the aprons to get them nice and neat. Once ironed, I folded them in half (short end to short end) and ironed a crease in the middle.
Step 2: Choose two aprons for the bottom “skirt”, and one that will be cut in half for the top. You’re going to make these into a “T shape, where the long part of the T intersects the short “half” of the other piece.
Step 3: Cut the tea towel in half. Hem cut end.

tea towel aprons

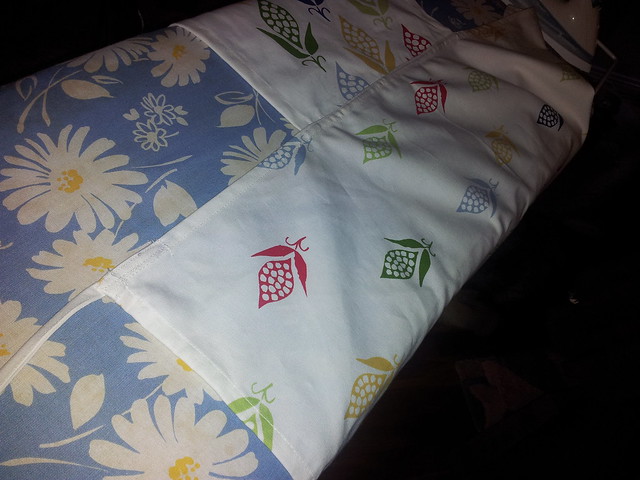
Step 4: Pin the 1/2 tea towel now hemmed to the full towel in the middle to form a T type shape. This will form the basic shape of the apron.
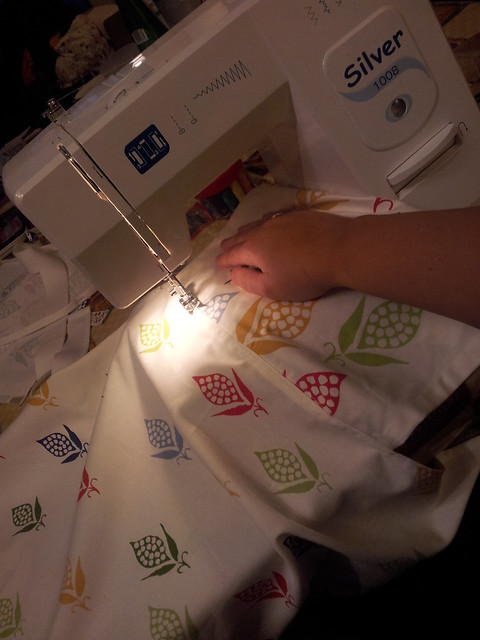
Step 5: Sew together

tea towel aprons

Step 6: Now that you have the “T” shape you have the basic apron. Cut 3 – 1/2 meter lengths of the binding or ribbon. Attach one piece to either of the ends of the apron skirt to tie around your waist.
Step 7: Cut the remaining 1/2 meter ribbon or binding in half (1/4 meter) and sew onto the corners of the top of the apron to tie around your neck. (You could also measure and make it a loop if you didn’t want to “tie” it together)
Step 8: Press.

tea towel aprons

Step 9: repeat with the other full towel / remaining piece of apron.

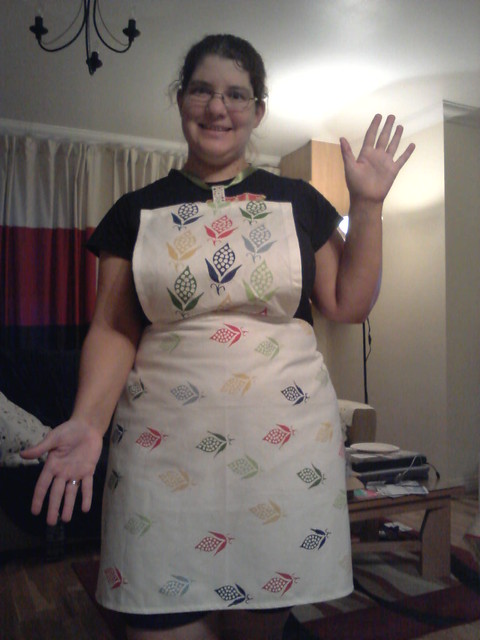
Step 10: model your creations!

tea towel aprons

tea towel aprons

Notes: Notice that I did the necklines two different ways. This is because the one apron had the “drawer” hang on it. I thought that rather than sewing the ribbon on, it might be easier to use that and loop the ribbon through. The second one, I decided that I prefer it – because of how the ribbon was sewn into the corners of the top. It just felt more secure. I may eventually go back and re-do the one (and not bother with the hang loop) but we’ll see.

I think I’m going to be making a few of these as Christmas Gifts, as part of my homemade holiday goals.

Share

How to Make a Voodoo Doll

IMGP0381-26

Earlier this month, I was talking to the Bar Manager over at Fibbers Rock bar on Ormond Quay about how I think there should be a Mardi Gras type celebration here in Dublin. Out of this idea, there result snowballed – and I offered to do the decorations for the New Orleans Style “Voodoo Mardi Gras” party for Charity. Jason got a band booked – T-bone (more on them later) and I started on the decorations, determined to make this an awesome event.

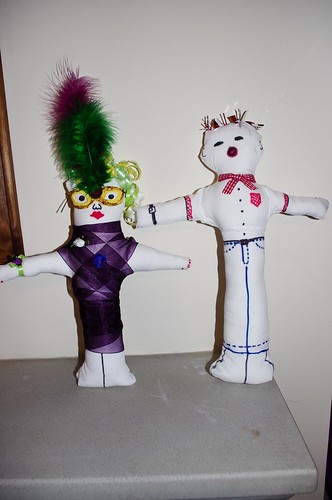
Being that this was to be a Voodoo Mardi Gras party at a Rock bar, naturally, we needed some Voodoo Dolls as decorations. After some looking about, and knowing that I can’t sew – I figured out a fairly fast way to make the dolls themselves – and get them put together using fabric glue and some bits and pieces of crafting stuff I had about. Here’s how I did it – and what you can do to make your own No Sew Voodoo Doll.

What you need:

  • Old Fabric – I used plain colors, but old t-shirts, sheets, or tea towels would do as well.
  • Scissors
  • Fabric Glue
  • Sewing Pins
  • Newspaper
  • Stuffing (I got some poly cotton stuffing – a small bag made ~4 dolls)
  • Fabric Markers
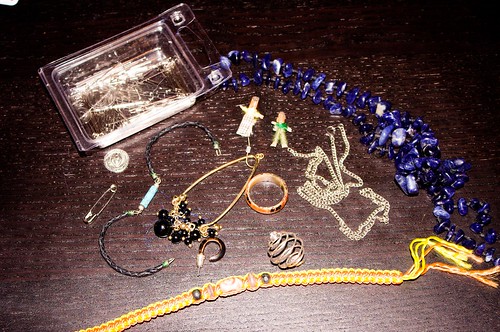
  • craft odds and ends – old buttons, old beads, broken necklaces/bracelets, craft foam, ribbons, yarn, craft flowers, feathers, glitter glue, the sky’s the limit.


    Step 1:
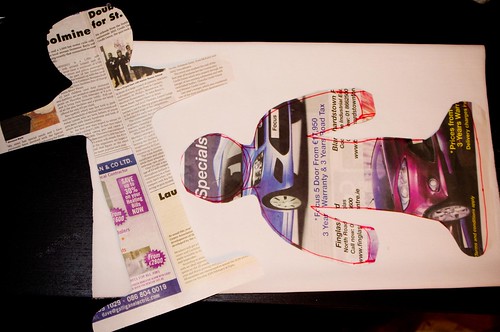
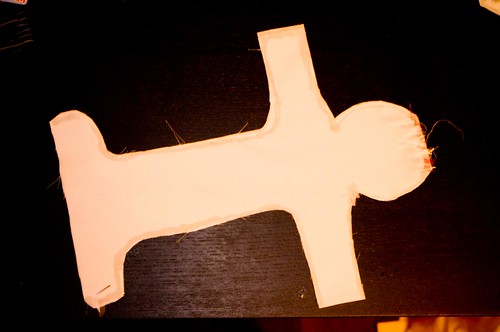
    Lay out your newspaper and draw the appropriate shape for the Voodoo Doll you want. I found it easier to do the legs together and the arms out, but I also made one pattern with the arms at the side. Make it about twice as big as you think it should be. Eg. The arms were about two finger widths wide to account for the glue and turning it inside out.

    Step 2: Cut out your shape.

    IMGP0294-1

    Step 3: Pin the shape to your fabric – I folded my fabric so that I cut 4 at the same time (2 doll fronts/backs)

    Step 4: Cut the shape out of the pinned fabric, and remove the pins.

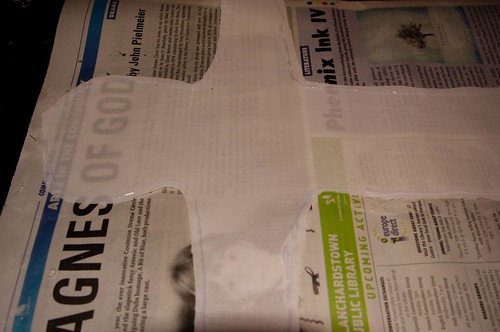
    Step 5: Lay down some newspaper to keep the fabric glue off your table. Place down the first bottom of the doll and apply the glue to the outer edges, leaving the area near the foot part with no glue so you can turn it inside out later.

    IMGP0309-11

    Step 5.5: (Optional: if you want the doll to have “hair” you should apply the glue, the ribbon/yarn/other pieces of fabric sticking toward the inside of the doll)

    Step 6: Carefully lay another piece of your fabric down on top of the first piece, carefully lining up the edges. Push down on the glued area with the back of a spoon to make sure it is well adhered.

    IMGP0299-2

    Step 7: Set it aside to dry for about an hour.

    Step 8: After the glue has dried, take your piece off the newspaper. The glue should have dried clear.

    IMGP0301-3

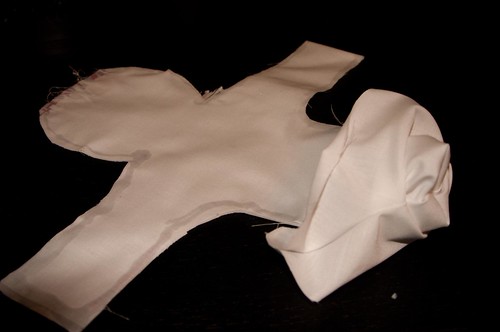
    Step 9: Turn the doll shape inside out.

    IMGP0303-5

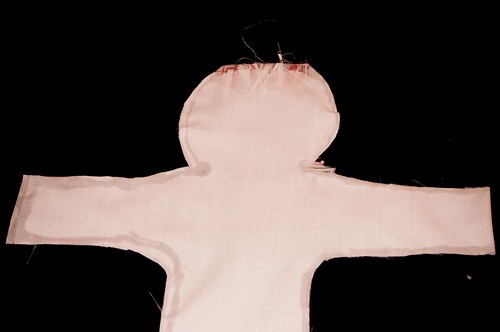
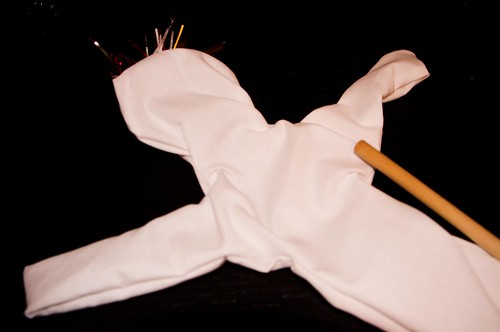
    Step 10: Use an unsharpened pencil to push out all the edges of the arms and into the edges of the legs or head.

    IMGP0305-7

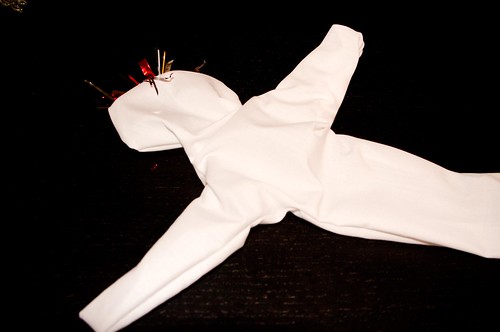
    Step 11: Your doll should now look something like this:

    IMGP0304-6

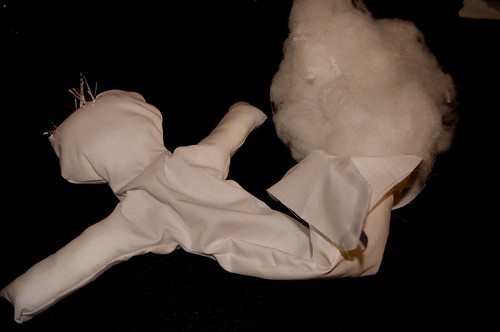
    Step 12: Let’s get stuffing! Carefully break up your stuffing and place it into the doll. I recommend filling the arms up first, then working from the head down. Use the pencil to push it into the arms and pack it tightly, being careful to not overfill and break the glue seam.

    IMGP0306-8

    Hint: As you fill your doll, you may discover that the arms curve, or that the head tilts. Personally, I think it gives them more personality.

    Step 13: Add or remove stuffing as needed, until you have filled it almost to the end, leaving space to turn in the base and glue closed.

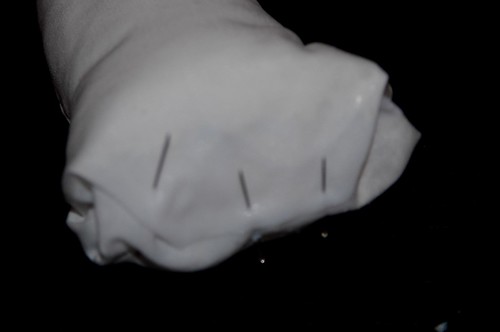
    Step 14: Fold in the ends, and apply fabric glue anywhere that the fabric will touch itself. Be generous, but try to be neat. Once applied, you may need to pin the end closed to hold it together while the glue dries.

    IMGP0308-10

    Step 15: Set aside and let the glue dry on the base. When dry, remove the pins.

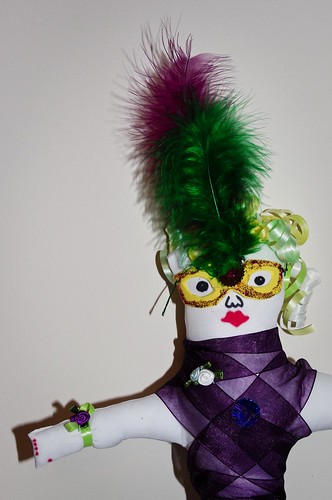
    Step 16: Let’s Decorate. I raided my craft odds and ends stash for all of the dolls that I made. I picked up fabric scraps for clothes, old buttons, broken bits of jewelry, old ribbons, old stuffed animal bits, some tiny paper dolls, feathers, etc etc and attached them by tying, glue, or few stitches. Don’t forget to draw on some faces.

    IMGP0302-4

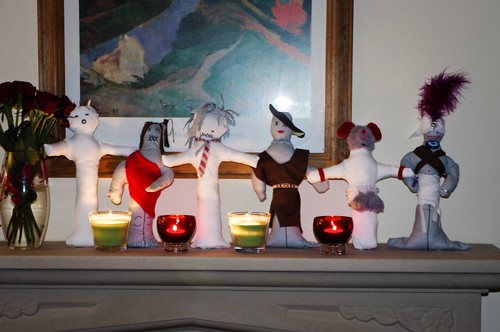
    Step 17: Your voodoo doll is complete. Light a few candles, stick them with pins or toothpicks, place on the mantle, and enjoy.

    IMGP0318-20

    A few thoughts – I was making several dolls at once, I turned it into a type of assembly line. I cut them all first, then glued 3 or 4 and set them aside. Then, I cooked dinner. After dinner, I turned them all inside out, glued the other 4 and set those 4 aside to dry. Returning to the first 4, I stuffed those and closed the ends off. By the time this was complete, The second “set of 4” was done, so I repeated the turn inside out, stuff, and glue ends. Setting those 4 aside, the first 4 were done, and I began to dress and decorate.

    IMGP0380-25


    Share