Recycled Christmas Card Bunting – How to

Christmas just isn’t Christmas without holiday cards. I’ve always loved to get mail, and at the holidays, I find the beauty of Christmas cards from around the world make me smile in their color, sparkle, design, and different languages. Some are elegant, others sparkly, some are celebrating winter and snowflakes, while others show off all the traditions of the holidays. Every year, I carefully pick out or make my cards and try to get them out the first week of December. And then.. the waiting begins. I practically stand at the door every day (hurry up postman!) waiting for the colorful envelopes. After all, no other time of year does the mail from my friends and family come in droves – out weighing the bills. (Who likes bills?!?).

Once they arrive, I carefully open each one, basking in the joy of the card (it’s like a little gift in each one) and then put it on the mantle or tape it up to the walls in a lovely display. When Christmas is over, I save each card – and try to find unique creative things to do with them later. It’s a great way to Upcycle, be eco-friendly, and keep memories intact from year to year.

Untitled

This year, I didn’t have much money for decorating my flat. I’d spent most of my savings on medical bills, and that meant that not only was I trying to do handmade items for Christmas (I had time – not money) for everyone, I had to find a unique way to decorate. This is what I came up with. A simple re-purposed series of Christmas cards that were a bit folksy, eco-friendly, and totally made me smile every time I saw them hanging across my mantle.

Here’s how I did it, so you can make your own Recycled Christmas Card Bunting.

Untitled

    Materials:

  • Old Christmas Cards
  • Round template – I used the top off of a Pringles Can
  • Oval Template – I used an old Scrapbooking shape
  • Scissors
  • Craft glue
  • Hole punch
  • Ribbon or String

    Untitled

      Steps:

    Step 1: Take your circle or template and move it around on the card until you find a place you’re happy with. Depending on the card, you may be able to get two circles or ovals per card.

    Untitled

    Step 2: Trace around the template and then cut out the shape. Repeat for each of your cards. Try to get an even number of similar theme or similar looking cards. Don’t forget that you may be able to use the inside wording from the card or back of the card may have pictures too!

    Untitled

    Step 3: For double sided cards, match similar cards together – eg. The two snowmen on the far left came from the same card and look nice front / back. Add glue to the reverse of one of the rounds, taking note of which way is “up”.

    Untitled

    Step 4: Attach the round to the other selection, again, being careful that they are both in the correct direction when looked at on the front and back.

    Untitled

    Step 5: Squeeze out excess glue, wipe it off, and then weight the round with a book for a while until the glue sets. Wait for the glue to dry.

    Untitled

    Step 6: Once the glue is dry, punch 2 holes in the top of each card.

    Untitled

    Step 7: Thread the ribbon through the card, making a center and trying to balance the size / shape / color on each side of the bunting.

    Untitled

    Untitled

    Step 8: Hang up across your mantle, on your wall, or anywhere else where you want the display.


    Untitled

    A few other things you can do with the same technique – just punch fewer holes –

    Christmas Ornaments
    Mobiles to hang from ceiling
    Why not make a Rectangle from a card – and hang several different size rounds down from it like raindrops from a cloud
    Add some mod-podge and make necklaces
    Attach some flower wire and make centerpieces for the table

    What else can you think of? Share your ideas and how this turned out for you – I’d love to see it!

    Share
  • From Shed to Chic

    The old shed...

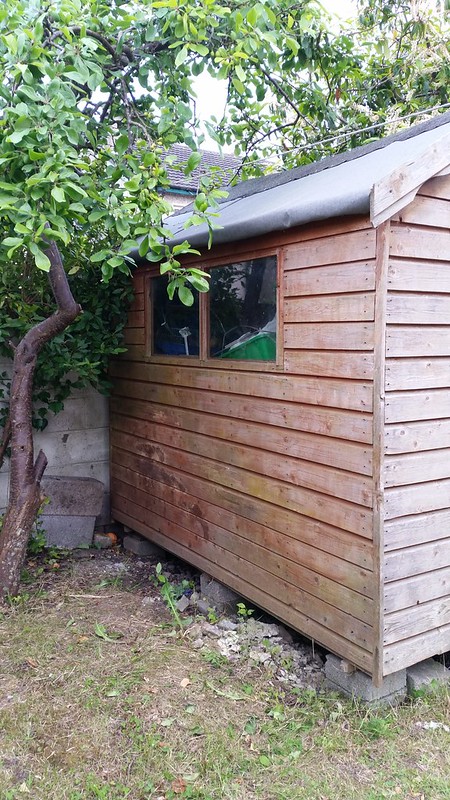
    Earlier in May, I moved from my old apartment in Blanchardstown to a new (to me) rental home in Castleknock – about 10 minutes away from where I was. The home is about 25 years old, and made of cinder blocks. The inside is pretty standard for a 3 bedroom 2 level home, though it needs some work for modernisation and updating. The yard/ garden is a good size – but you can tell it hasn’t had much work recently. (The last renters left the place in quite a poor state).

    When I went to move in, I explained to the renting agency that myself and my roommate are two professional ladies, and that my father has owned a grounds maintenance / landscaping business for 20+ years. I grew up with grandparents that farmed and then my father who constantly was putting me to work with flowers, planting, mowing, and taking care of a yard / garden. I could see the “potential” of the property – and couldn’t wait to make it beautiful again. Well, I think that was the clincher.

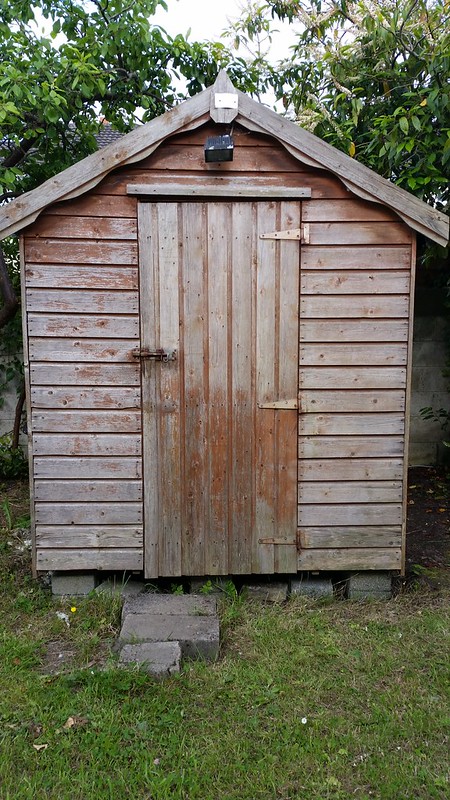
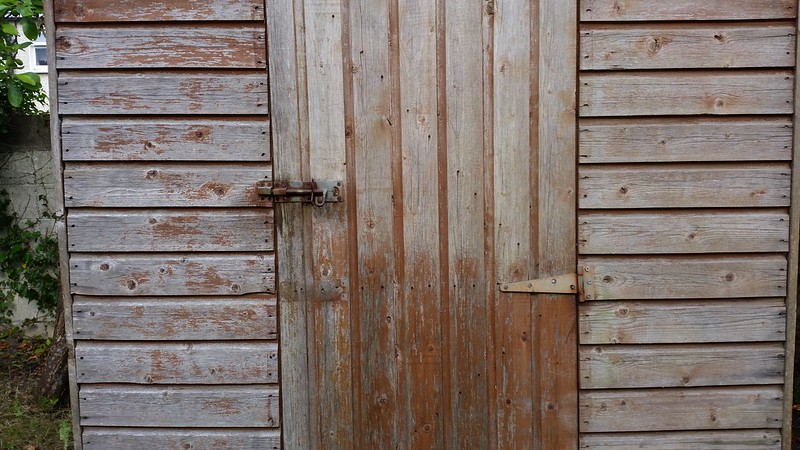
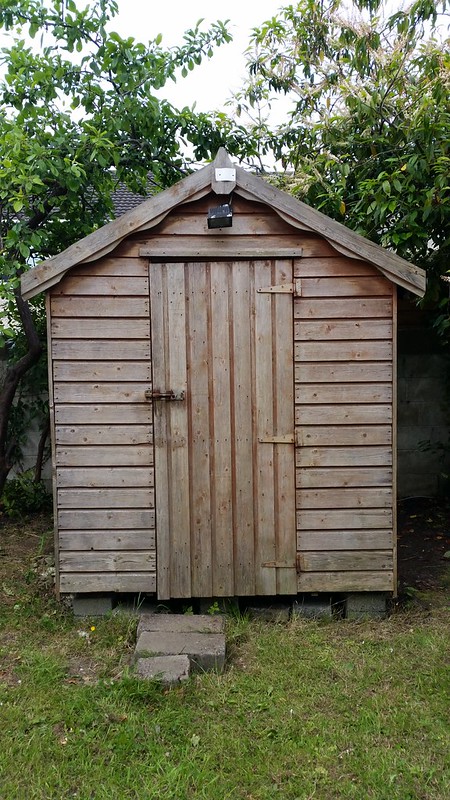
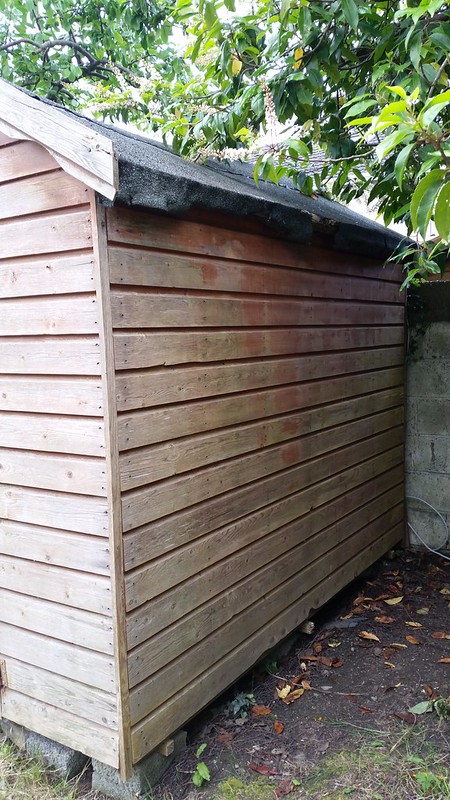
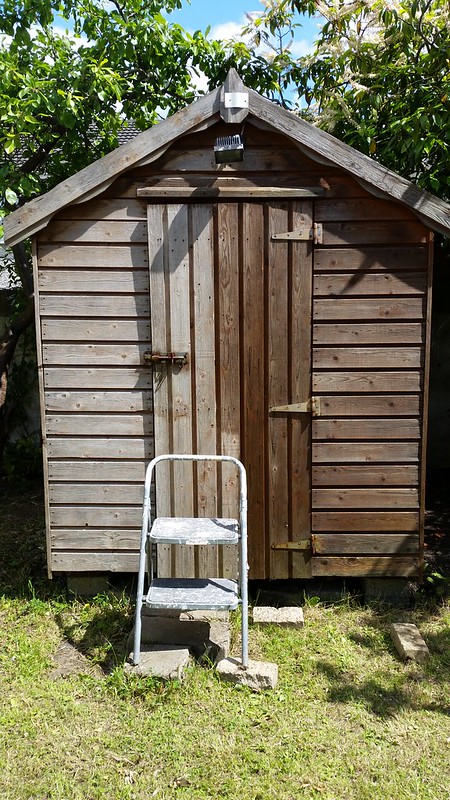
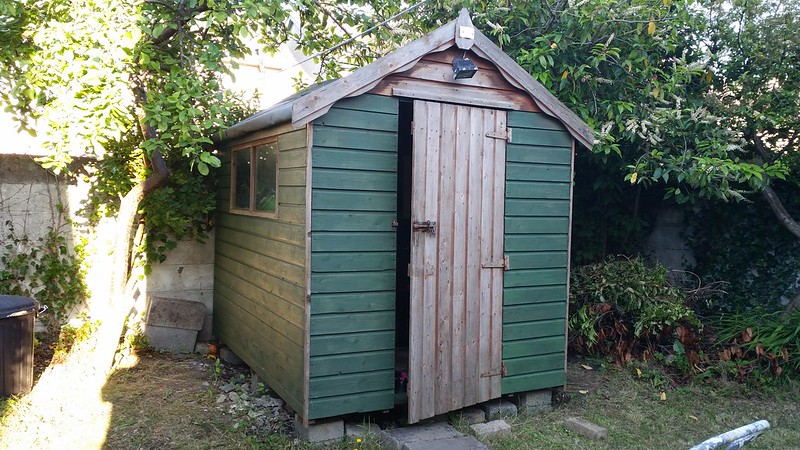
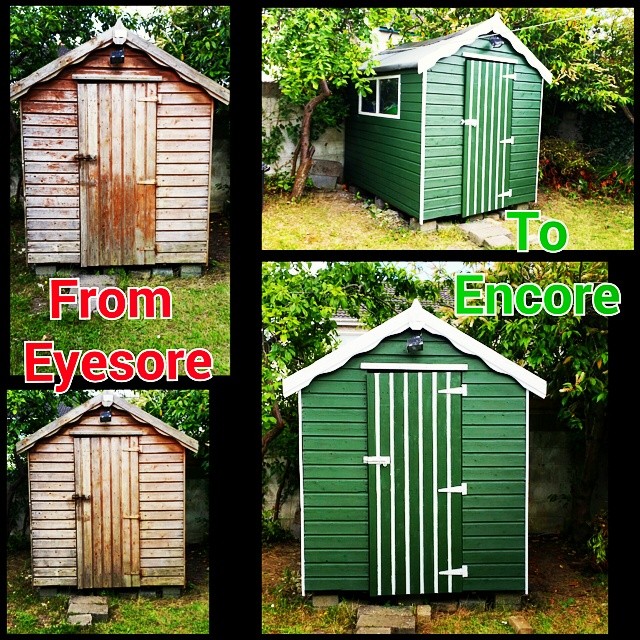
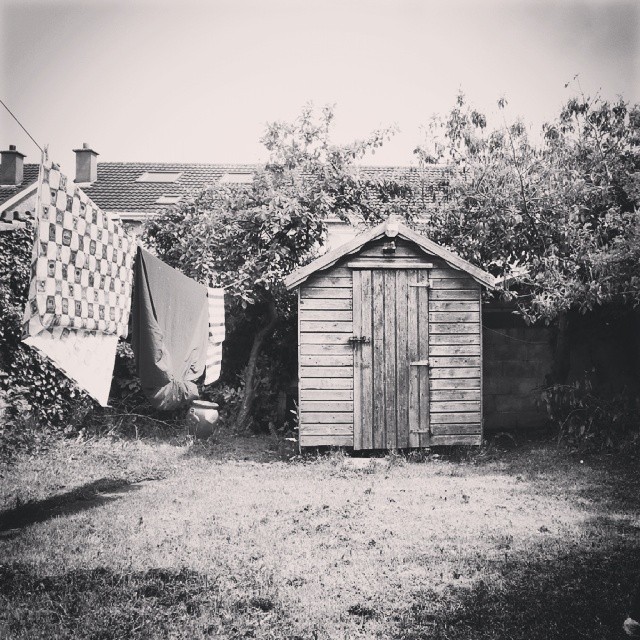
    After a slow start to getting moved into the house and some challenges with getting some of the basics in (Internet, phone, gas, and an electric cable taken out of the trees), I decided to set to work. The old shed in the back garden was an absolute eyesore. Paint peeling, weather beaten, and bug infested it made a pretty “rustic” and “rural” picture (see the top) when it was in black and white. However, when I put a couple chairs out there, I just couldn’t bring myself to look a it – it looked like a ruin.

    BEFORE:

    Repainting the shed... diy...The Before

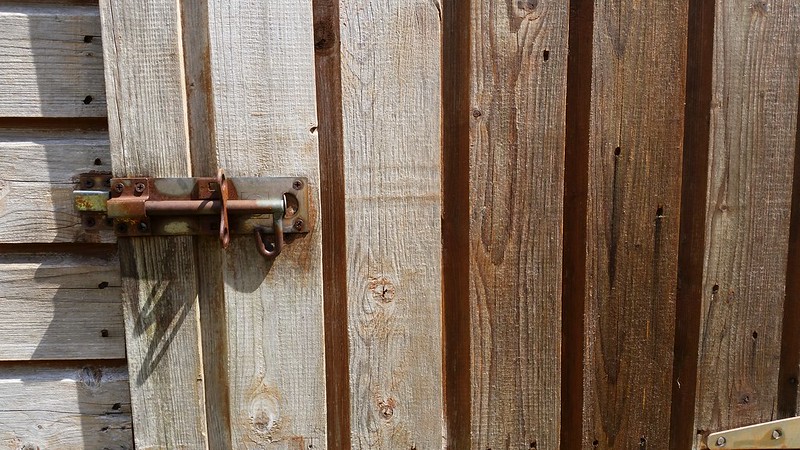
    closeup of the door & panels (peeling paint, weather beaten, and bug infested:

    Repainting the shed... diy... before (closeup)

    The first day, I set to scraping, sanding, and scrubbing it down with sugar soap. Even that made a difference on the poor old shed – and showed off the green algae that had taken hold on the bottom of the door.

    All Sanded, Scraped, and Sugar Soaped:

    Repainting the shed... diy...Sanded down

    Repainting the shed... diy...Sanded down

    Repainting the shed... diy...Scraped & sanded

    After about 4 hours doing the above, the evening was over. The next day, I started coating the shed – 3 coats of a bug killer, wood protector and a wood sealer. You can see that it’s half done here, and even that it started looking a bit more “loved”:

    Repainting the shed... diy...Sealing - first coat

    Repainting the shed... diy...bug coat / sealing

    Next up was the painting. 3 coats of the green heavy duty 5 year waterproof paint with wax to help keep it looking good for a long time.

    First coat:

    Repainting the shed... diy...

    Repainting the shed... diy...

    Second & third green coat & the start of the primer for the white:

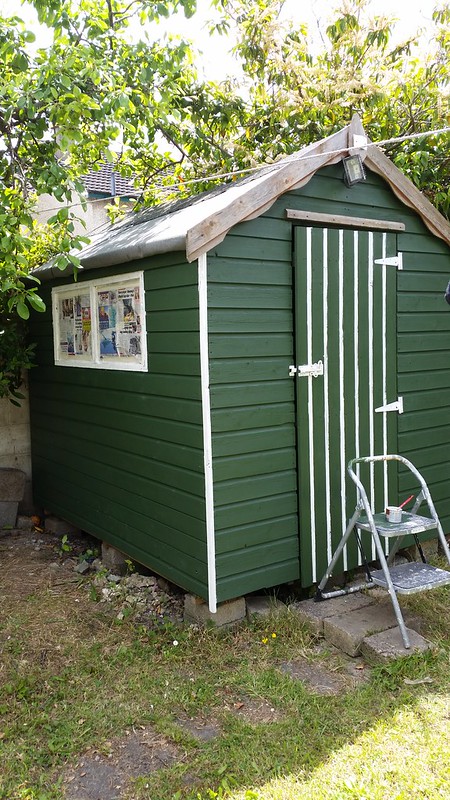
    Chic Shed - adding the white trim

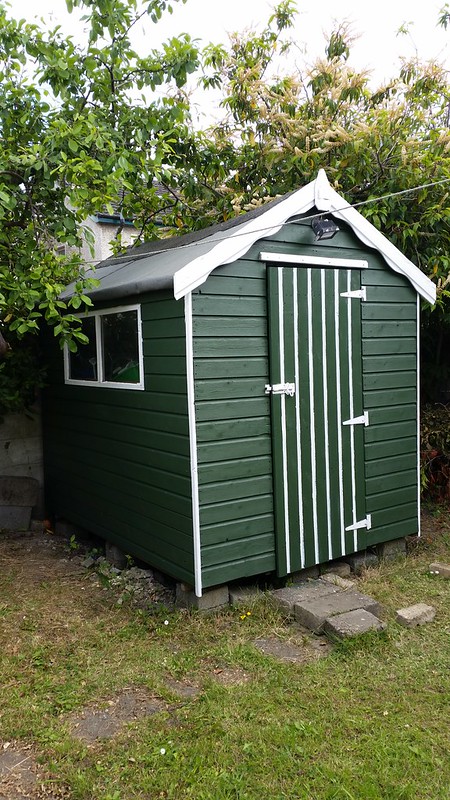
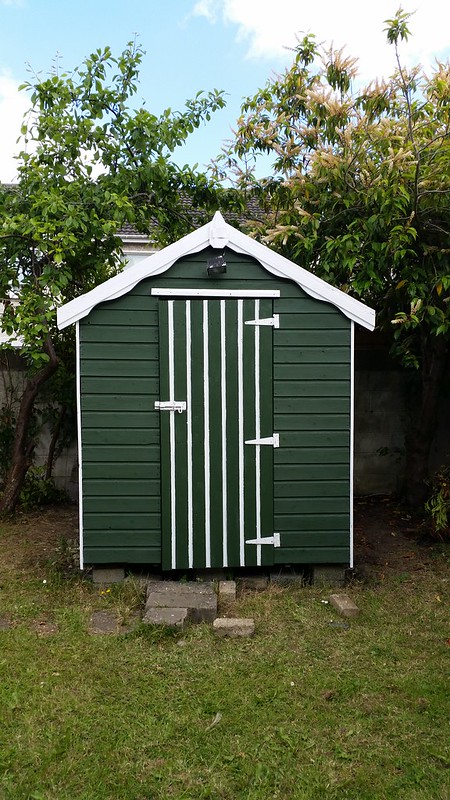
    Finally, the high gloss white paint to contrast the flat dark forest green:

    Chic Shed - Encore!! (Time for a beer!)

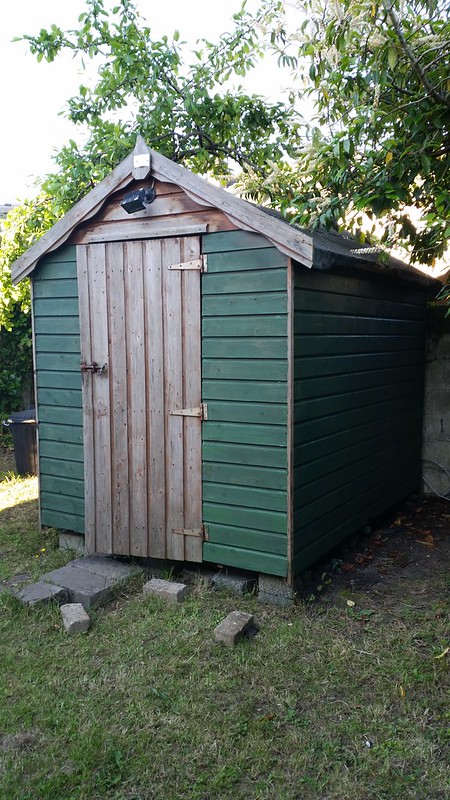
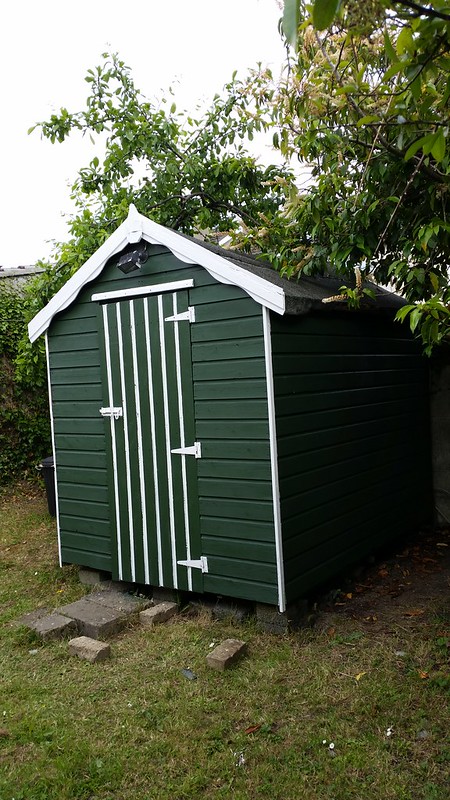
    Chic Shed - completed

    And it’s all completed. My shed has gone from “Oh Shed” to “Oh Chic”, from an ‘eyesore’ to “needs an encore”. I’m pleased it’s become a garden feature, and looking forward to getting in some flowers and plants to really make the place look more appealing in the coming months.

    Starting last weekend with scraping, sanding, and scrubbing; and then 3 coats of sealer and bug killer. Add in 3 hours after work for 3 days and 3 coats of heavy duty 5 year outdoor paint; and  this morning for the white primer and trim x2 coats. It won't

    Total spent – 100 Euro, 24 hours (after work & the weekend)

    And the shed? Well, it’s looking so much more loved.

    My Chic little shed (all complete)

    Share

    Doodle Magnets – How to & advice

    At the dollar store, they had art kits for 1.49. It came with 1 inch square tiles, paint, a brush, and magnets. Rather than use the paints, I colored /doodled on them with sharpie marker and baked at 400F for 20 minutes...add a magnet... instant customise

    Sometimes, being a Jill of all Trades (or crafts in my case) makes for a bit of fun when shopping. I was at the Euro store near where I live recently buying the standard toothpaste, shampoo, conditioner, batteries and the like when I happened to head down the crafts aisle. Generally speaking, the crafts in the row are geared toward children, and sometimes you’ll get yarn or a bit of something that is for card making or can be used for something else. It’s usually inexpensive, and an almost never-ending supply of inspiration for me. Near Christmas, I saw a set of do it yourself magnets in a packet which got my wheels turning.

    Untitled

    The craft set contained 5 unfinished ceramic tiles, a few acrylic pots of paint, self adhesive magnets, and a paintbrush – for 1.50 Euro. I went a bit mad and bought several packages, because I thought that I wouldn’t paint them – I would do permanent marker doodle crafts instead.

    Untitled

    What are permanent marker doodle crafts you ask? Well, basically, you get sharpie brand markers (or other permanent markers) that you can draw with. You’ll need some ceramics (eg. A Mug, Tiles, ceramic box, etc.) and you doodle on them with the markers.

    Untitled

    Then, you bake them in the oven at 350 F for 15-30 minutes to set the marker so it can’t be washed off. I’d seen some interesting ideas for this on Pintrest, and had been keeping my eyes peeled for something suitable to try this on. For me, I thought the magnetic tiles were going to be perfect as they were inexpensive and small enough I could try all the different colors / designs I had in mind.

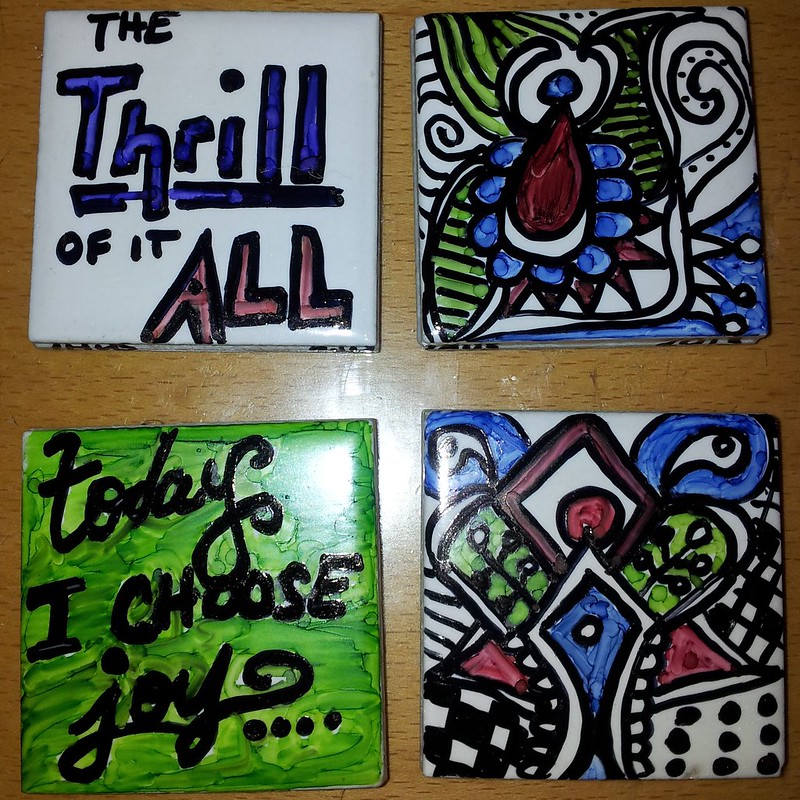
    Once I got home, I started out with my off brand permanent markers (again 1.50 Euro at the Euro store) and set to work. A few of my designs:

    Untitled

    Untitled

    Untitled

    Untitled

    I really liked how bright and colorful they were, and was rather encouraged as I put them in the oven. I checked them at 15 minutes, and they weren’t even warm yet, so I put them on for 15 minutes more. Mistake.

    You see, once the ceramic starts getting hot, the marker sets very quickly. And little did I know – the colors also change with the addition of heat. The black stays the same, but the Red turns pink or brown; the Bright Green turned yellow, the Violet went pale blue, and yellow? Well it turned orange. And they weren’t bright anymore. So, while I liked how they turned out – I ended up going back and re-coloring where I could and re-heating them a second time.

    I realize now two things that would have made it easier –

    a) You have to watch the heating process very closely – once they start to discolor they need to come out of the oven – immediately.
    b) Rather than worrying about watching like a hawk – it may be best to use only black and the plain ceramic color to make the designs. I liked the addition of color in mine – but in the end, they would have been just as striking had they only been black / white.

    After heating and befpre a bit of recolor/second baking you can really see the discoloration on the middle two:

    Untitled

    What did they look like when they were done? Not bad – just not what I expected. And they still made great Christmas gifts for my homemade holidays. 2 per person – so out of 4 yellow packages; I got 10 unique Christmas gifts. It ended up being 0.75 Euro per gift – including the cost of the markers (which I still have plenty of use out of). Handmade AND inexpensive. Who can argue with that ?!?


    Share