Leprechaun Museum Trip

IMGP0325-2

I like living in Dublin. It’s a new city, and that means all kinds of new things to explore and do. When I can get a discount like I did last month from one of the online deals websites, I tend to jump at the chance to go out and explore my new home a little bit more. One of the more recent daily deals was for the National Leprechaun Museum, for half price.

IMGP0326-3

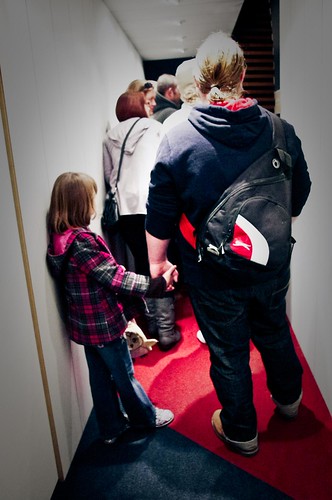
Waiting to get into the museum

The thing is that I had 2 tickets, but I thought this might be the perfect opportunity to “borrow” my friend’s daughter (and give her parents a weekend sleep in) and her honorary uncle, and make a day of adventure for us all. Thus, I made some arrangements to meet at 10 am, take the intelligent Munchkin to the city to see the “little people”, have some lunch, and then visit the candy shop as a set of three people. I had a great time – and so did they. The Leprechaun Museum, in my opinion, is much much better with a child because they still have the innocence to enjoy the story telling.

IMGP0328-5

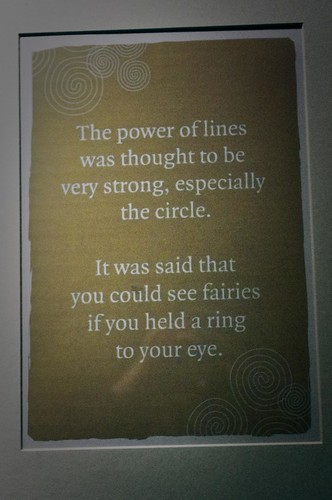
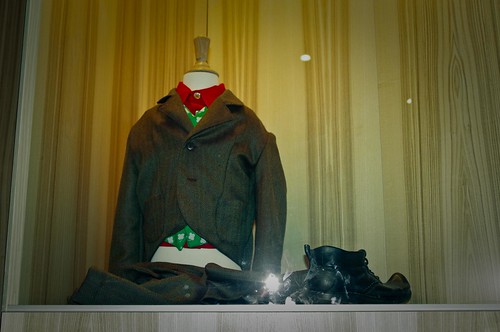
We got there and were the last ones on the tour. The museum itself isn’t very big – it took about an hour to go through from start to finish. Through most of the museum, you’re accompanied by a story teller, who tells the stories of Ireland – this includes legends of the Leprechaun, tales of the Salmon of Wisdom, Banshee, and those are just the ones I remember. In the beginning, our tour guide told us how Leprechauns have changed their look – it used to be that their hats were red – the red gave them the “magic” powers. They actually looked more like the Gnomes of Germany, to me. As she told us the tale, she pointed us to a tunnel – where we got to enter the magical (Abstract) world of the Leprechauns.

IMGP0327-4

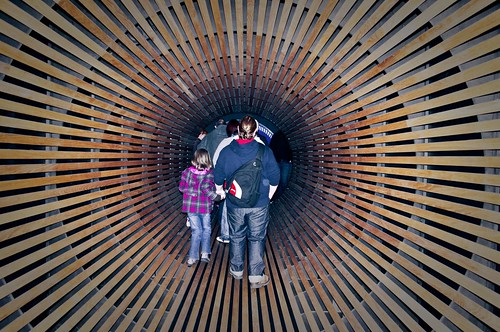
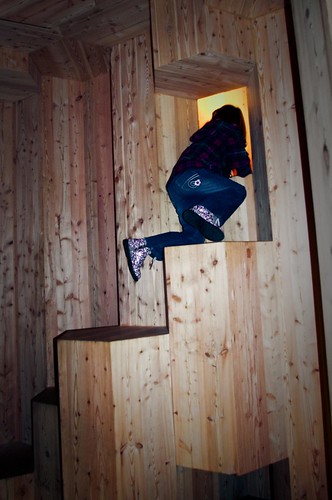
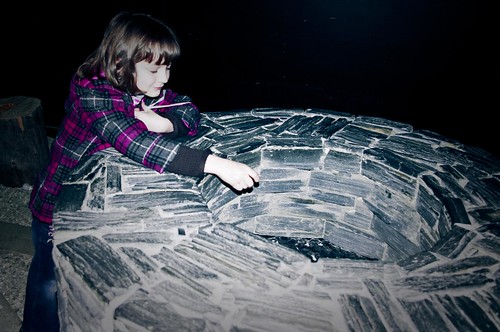
From there, we were taken to a wooden abstract representation of the Giant’s Causeway, which was almost like a maze, full of things too small for me as an adult to climb on, but for the kid – exciting to climb up and perch, wander through and hide, and even look through for a different view above the museum rooms.

IMGP0332-8

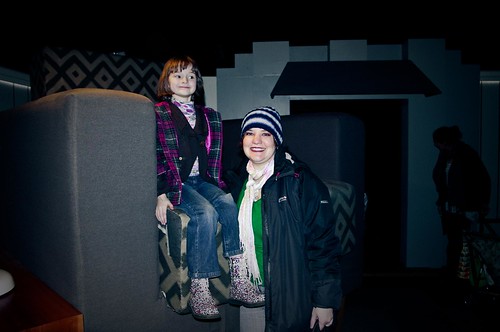
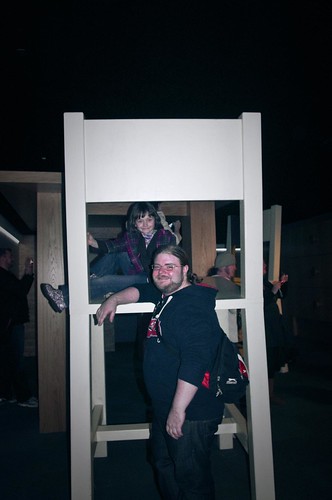
Once we found our way out, the next room we entered was the Giant’s room. Everything in here was 3 times bigger than normal size. The dining table and chairs, the easy chair, lamp, and easy chair. The giant coffee cup. A huge set of dresser drawers. For adults, it’s like being a kid again. For the kids, well, it’s extra big and makes for tons of laughter and delight.

IMGP0333-9

IMGP0335-11

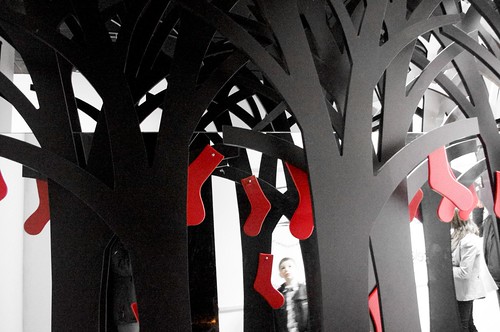
From this room, the munchkin raced along forward and hit a hallway filled with the legend of the red socks. I read it to her and a few of the other children about the place as we walked along the hallway. The summary of the story was that there was a leprechaun who got caught by a man. Knowing that once caught, Leprechauns have to give their gold over to the one who caught them, the man was delighted. He kept his eyes on the sneaky Leprechaun and forced it to lead him to the gold. The Leprechaun led the man to a grove of trees, and pointed out where the gold was buried. Not having a spade handy, the man took off his red sock and tied it to the tree, letting the Leprechaun go. Then, he headed home to get something dig up and carry the gold with. When he returned, he found that all the trees had red socks tied to them. The result was that he decided there were too many trees with socks, and it would take too long to find the gold again. (It’s supposed to illustrate how tricky the Leprechaun are.)As we rounded the final corner, we were in a room filled with black trees and red socks – and on the walls there was a creative use of mirrors that made the room feel bigger than it was.

IMGP0358-33

From there, we walked through a few rooms with an Irish map, some Mythical Irish place names.. and on the ceiling were a series of umbrellas:

IMGP0340-16

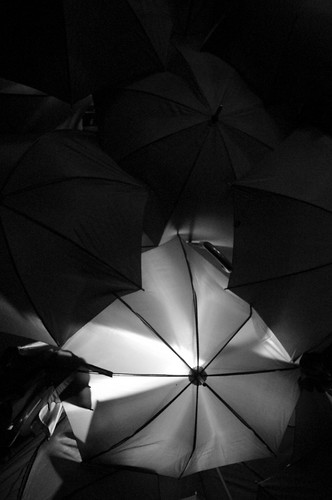
As we left this room, and went into the next, we walked through an Irish Rainbow …

Walking through a rainbow

And found ourselves looking at the pot of gold:

IMGP0348-24

Another tale was told, and we headed into the final rooms, filled with a wishing well to make a wish in and and plenty more legends to think about on the way to Mc Donald’s for lunch, and then to the candy shop for a cupcake and candy.

IMGP0363-37
Making a Wish

Two thoughts on the Leprechaun museum – 1) Go early and try to go during the week. If you can’t get in on one of the tours, it’s about an hour or two wait for the next tour. 2) Take a child. It’s so much more delightful as they discover the legends and race from room to room with excitement.

Share

Mardi Gras for Charity

Voodoo Mardi Gras for Charity Poster

Last Saturday, March 5, I worked with Fibbers on Ormond Quay to put together a New Orleans Style Voodoo Mardi Gras Party. The goal was to have some fun, and raise some money for Our Lady’s Children’s hospital (Crumlin) here in Dublin. For my friends in the US, they are essentially the equivalent of Primary Children’s Hospital in Salt Lake, or Eggleston Children’s Hospital in Atlanta.

The Bar Servers

Jason, (Above center) the bar manager of Fibbers put together a great night – he organized the raffle, he got a fabulous band called T-bone, and printed off the poster and flyers for the event.

Mardi Gras Queen

Meanwhile, I did the poster (top) out of a bunch of creative commons images and some of my own from Mardi Gras, made the No Sew Voodoo dolls, and created the bar decorations including a pair of huge poster sized theater masks in frames, decorations to hang from the ceiling (about 20 violet music notes on yellow and green curved backgrounds), and purchased a bunch of masks that were supposed to arrive in time to decorate and sell with the price of admission. It was a lot of work, but in the end, it was worth it – we raised about 500 Euros – despite the hiccups. (The 80 masks and about half the beads didn’t come in time for the party, so we wound up raising all of the money solely through the raffle. Also, not all of the decorations got hung up because there wasn’t enough time in between the underage gig and our fund-raising event.)

Most of the pictures are up here in my Mardi Gras set.

I do have some video of the band to upload if I can get my video media maker working again, but it’s a bit dark, so it may not work. Otherwise, by the time I got home and to bed (nearly 4am Sunday morning) I was completely wrecked. Apparently, so was my Mardi Gras dog.

Tuckered Out

Here’s hoping your Mardi Gras was as successful and fun as mine!

Share

How to Make a Voodoo Doll

IMGP0381-26

Earlier this month, I was talking to the Bar Manager over at Fibbers Rock bar on Ormond Quay about how I think there should be a Mardi Gras type celebration here in Dublin. Out of this idea, there result snowballed – and I offered to do the decorations for the New Orleans Style “Voodoo Mardi Gras” party for Charity. Jason got a band booked – T-bone (more on them later) and I started on the decorations, determined to make this an awesome event.

Being that this was to be a Voodoo Mardi Gras party at a Rock bar, naturally, we needed some Voodoo Dolls as decorations. After some looking about, and knowing that I can’t sew – I figured out a fairly fast way to make the dolls themselves – and get them put together using fabric glue and some bits and pieces of crafting stuff I had about. Here’s how I did it – and what you can do to make your own No Sew Voodoo Doll.

What you need:

  • Old Fabric – I used plain colors, but old t-shirts, sheets, or tea towels would do as well.
  • Scissors
  • Fabric Glue
  • Sewing Pins
  • Newspaper
  • Stuffing (I got some poly cotton stuffing – a small bag made ~4 dolls)
  • Fabric Markers
  • craft odds and ends – old buttons, old beads, broken necklaces/bracelets, craft foam, ribbons, yarn, craft flowers, feathers, glitter glue, the sky’s the limit.


    Step 1:
    Lay out your newspaper and draw the appropriate shape for the Voodoo Doll you want. I found it easier to do the legs together and the arms out, but I also made one pattern with the arms at the side. Make it about twice as big as you think it should be. Eg. The arms were about two finger widths wide to account for the glue and turning it inside out.

    Step 2: Cut out your shape.

    IMGP0294-1

    Step 3: Pin the shape to your fabric – I folded my fabric so that I cut 4 at the same time (2 doll fronts/backs)

    Step 4: Cut the shape out of the pinned fabric, and remove the pins.

    Step 5: Lay down some newspaper to keep the fabric glue off your table. Place down the first bottom of the doll and apply the glue to the outer edges, leaving the area near the foot part with no glue so you can turn it inside out later.

    IMGP0309-11

    Step 5.5: (Optional: if you want the doll to have “hair” you should apply the glue, the ribbon/yarn/other pieces of fabric sticking toward the inside of the doll)

    Step 6: Carefully lay another piece of your fabric down on top of the first piece, carefully lining up the edges. Push down on the glued area with the back of a spoon to make sure it is well adhered.

    IMGP0299-2

    Step 7: Set it aside to dry for about an hour.

    Step 8: After the glue has dried, take your piece off the newspaper. The glue should have dried clear.

    IMGP0301-3

    Step 9: Turn the doll shape inside out.

    IMGP0303-5

    Step 10: Use an unsharpened pencil to push out all the edges of the arms and into the edges of the legs or head.

    IMGP0305-7

    Step 11: Your doll should now look something like this:

    IMGP0304-6

    Step 12: Let’s get stuffing! Carefully break up your stuffing and place it into the doll. I recommend filling the arms up first, then working from the head down. Use the pencil to push it into the arms and pack it tightly, being careful to not overfill and break the glue seam.

    IMGP0306-8

    Hint: As you fill your doll, you may discover that the arms curve, or that the head tilts. Personally, I think it gives them more personality.

    Step 13: Add or remove stuffing as needed, until you have filled it almost to the end, leaving space to turn in the base and glue closed.

    Step 14: Fold in the ends, and apply fabric glue anywhere that the fabric will touch itself. Be generous, but try to be neat. Once applied, you may need to pin the end closed to hold it together while the glue dries.

    IMGP0308-10

    Step 15: Set aside and let the glue dry on the base. When dry, remove the pins.

    Step 16: Let’s Decorate. I raided my craft odds and ends stash for all of the dolls that I made. I picked up fabric scraps for clothes, old buttons, broken bits of jewelry, old ribbons, old stuffed animal bits, some tiny paper dolls, feathers, etc etc and attached them by tying, glue, or few stitches. Don’t forget to draw on some faces.

    IMGP0302-4

    Step 17: Your voodoo doll is complete. Light a few candles, stick them with pins or toothpicks, place on the mantle, and enjoy.

    IMGP0318-20

    A few thoughts – I was making several dolls at once, I turned it into a type of assembly line. I cut them all first, then glued 3 or 4 and set them aside. Then, I cooked dinner. After dinner, I turned them all inside out, glued the other 4 and set those 4 aside to dry. Returning to the first 4, I stuffed those and closed the ends off. By the time this was complete, The second “set of 4” was done, so I repeated the turn inside out, stuff, and glue ends. Setting those 4 aside, the first 4 were done, and I began to dress and decorate.

    IMGP0380-25


    Share