Earlier this month, I was talking to the Bar Manager over at Fibbers Rock bar on Ormond Quay about how I think there should be a Mardi Gras type celebration here in Dublin. Out of this idea, there result snowballed – and I offered to do the decorations for the New Orleans Style “Voodoo Mardi Gras” party for Charity. Jason got a band booked – T-bone (more on them later) and I started on the decorations, determined to make this an awesome event.
Being that this was to be a Voodoo Mardi Gras party at a Rock bar, naturally, we needed some Voodoo Dolls as decorations. After some looking about, and knowing that I can’t sew – I figured out a fairly fast way to make the dolls themselves – and get them put together using fabric glue and some bits and pieces of crafting stuff I had about. Here’s how I did it – and what you can do to make your own No Sew Voodoo Doll.
craft odds and ends – old buttons, old beads, broken necklaces/bracelets, craft foam, ribbons, yarn, craft flowers, feathers, glitter glue, the sky’s the limit.
Step 1:
Lay out your newspaper and draw the appropriate shape for the Voodoo Doll you want. I found it easier to do the legs together and the arms out, but I also made one pattern with the arms at the side. Make it about twice as big as you think it should be. Eg. The arms were about two finger widths wide to account for the glue and turning it inside out.
Step 2: Cut out your shape.
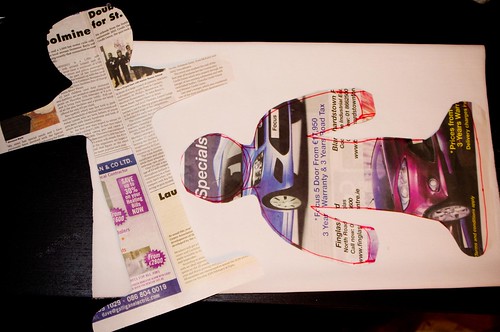
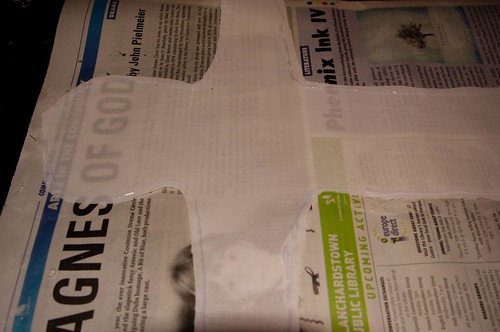
Step 3: Pin the shape to your fabric – I folded my fabric so that I cut 4 at the same time (2 doll fronts/backs)
Step 4: Cut the shape out of the pinned fabric, and remove the pins.
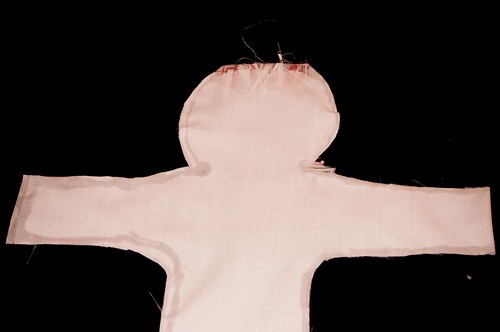
Step 5: Lay down some newspaper to keep the fabric glue off your table. Place down the first bottom of the doll and apply the glue to the outer edges, leaving the area near the foot part with no glue so you can turn it inside out later.
Step 5.5: (Optional: if you want the doll to have “hair” you should apply the glue, the ribbon/yarn/other pieces of fabric sticking toward the inside of the doll)
Step 6: Carefully lay another piece of your fabric down on top of the first piece, carefully lining up the edges. Push down on the glued area with the back of a spoon to make sure it is well adhered.
Step 7: Set it aside to dry for about an hour.
Step 8: After the glue has dried, take your piece off the newspaper. The glue should have dried clear.
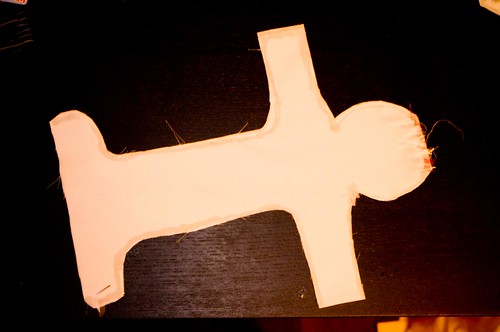
Step 9: Turn the doll shape inside out.
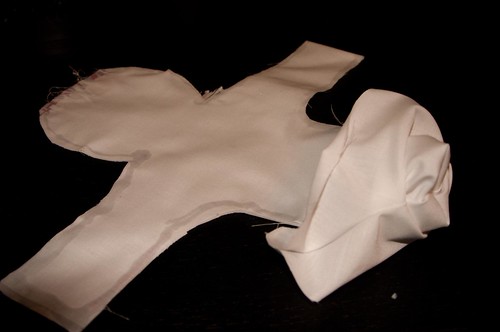
Step 10: Use an unsharpened pencil to push out all the edges of the arms and into the edges of the legs or head.
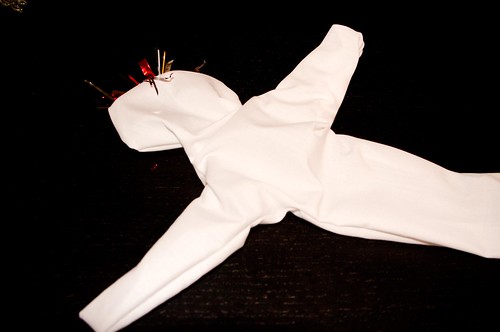
Step 11: Your doll should now look something like this:
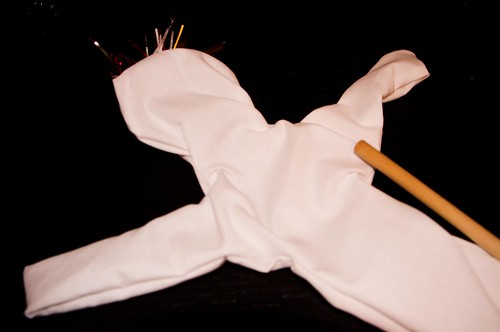
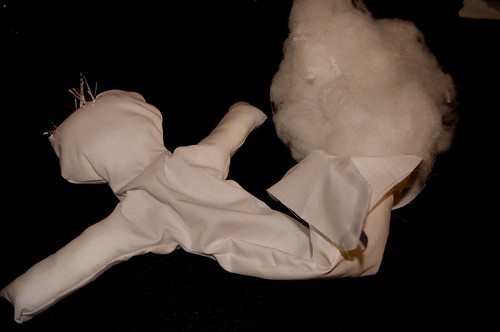
Step 12: Let’s get stuffing! Carefully break up your stuffing and place it into the doll. I recommend filling the arms up first, then working from the head down. Use the pencil to push it into the arms and pack it tightly, being careful to not overfill and break the glue seam.
Hint: As you fill your doll, you may discover that the arms curve, or that the head tilts. Personally, I think it gives them more personality.
Step 13: Add or remove stuffing as needed, until you have filled it almost to the end, leaving space to turn in the base and glue closed.
Step 14: Fold in the ends, and apply fabric glue anywhere that the fabric will touch itself. Be generous, but try to be neat. Once applied, you may need to pin the end closed to hold it together while the glue dries.
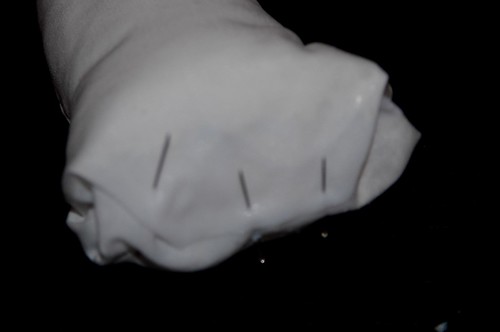
Step 15: Set aside and let the glue dry on the base. When dry, remove the pins.
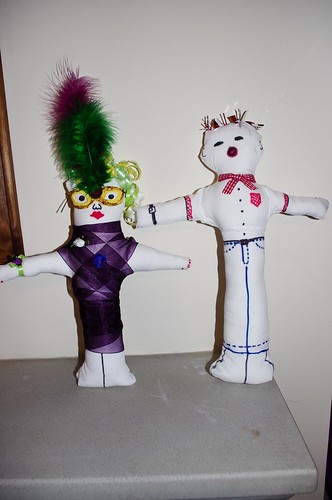
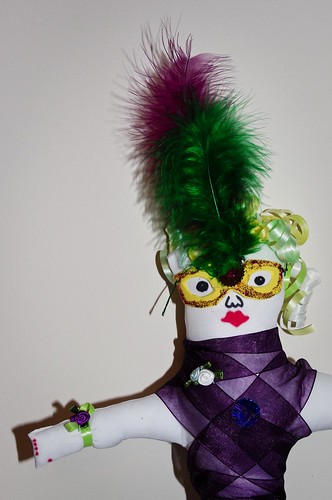
Step 16: Let’s Decorate. I raided my craft odds and ends stash for all of the dolls that I made. I picked up fabric scraps for clothes, old buttons, broken bits of jewelry, old ribbons, old stuffed animal bits, some tiny paper dolls, feathers, etc etc and attached them by tying, glue, or few stitches. Don’t forget to draw on some faces.

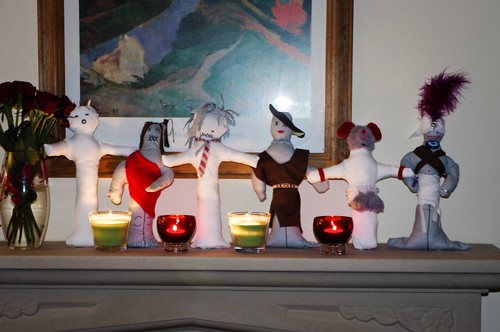
Step 17: Your voodoo doll is complete. Light a few candles, stick them with pins or toothpicks, place on the mantle, and enjoy.
A few thoughts – I was making several dolls at once, I turned it into a type of assembly line. I cut them all first, then glued 3 or 4 and set them aside. Then, I cooked dinner. After dinner, I turned them all inside out, glued the other 4 and set those 4 aside to dry. Returning to the first 4, I stuffed those and closed the ends off. By the time this was complete, The second “set of 4” was done, so I repeated the turn inside out, stuff, and glue ends. Setting those 4 aside, the first 4 were done, and I began to dress and decorate.