Crochet – Lattice Scarf Necklace

Crochet

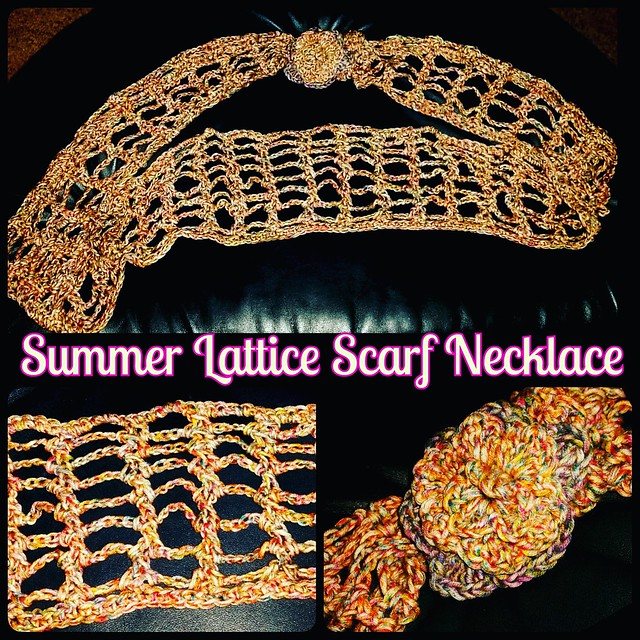
When I was in the US for my Sabbatical back in June, I brought with me two lovely skeins of cotton thread to the US. The previous December – I had an idea to make a summer lattice scarf necklace with some flowers. The scarf itself worked up quickly but get set aside in the shuffle of other orders in the new year. Picking it back up for the trip from Dublin to London (and a 3 hour layover before an 8 hour flight to the US), I managed to complete it.

20160608_222309

The scarf itself was easy to make. Basically a series of single crochet on the beginning and end rows – then a V stitch followed by 7 single chains, skipping the 6 stitches, to v stitch in the 7th over and over again. It’s worked in the round and lets you have a nice open work almost chain mail type scarf as wide or as thin as you might like.

20160608_222301

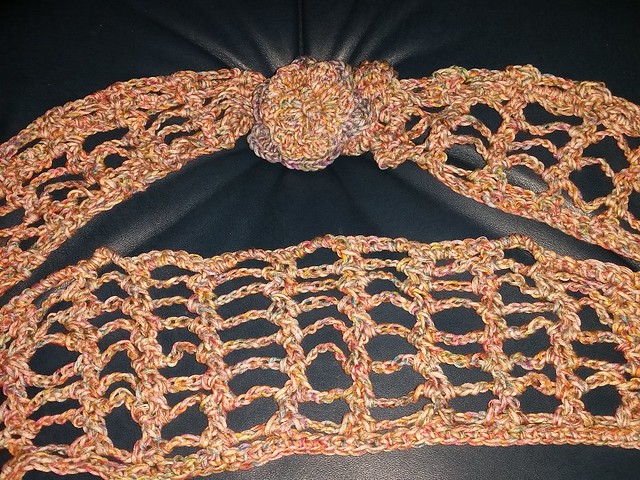
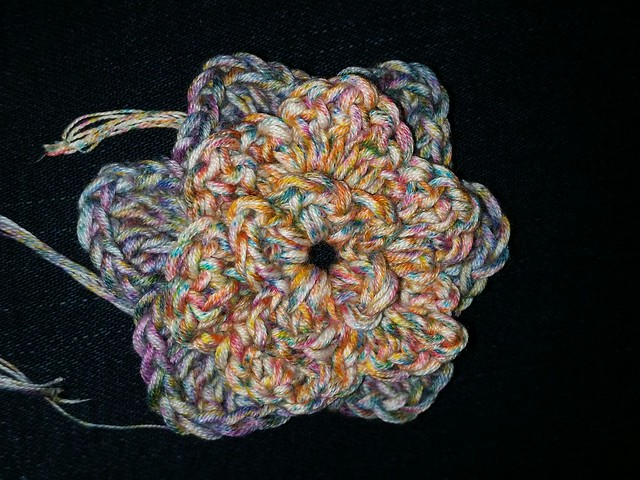
I turned mine into a cowl – and then added a flower. The flower closeup is below. This is actually the correct color of the yarn – as the flash seems to have caused it to be much brighter than the lovely peachy tan with blue flecks that it was.

20160530_105524

Modelling the scarf at the London Airport. Forgive the hair, and the lack of make up (and the slight scowl). I had been up since 4am – my flight was delayed – turning the 3 hour layover into 4 (thank goodness I brought plenty of yarn) and the flight to Chicago being later than expected. I did make it though – and get plenty of other projects completed while on my holidays in the US.

20160530_110231

Share

Recycled Christmas Card Bunting – How to

Christmas just isn’t Christmas without holiday cards. I’ve always loved to get mail, and at the holidays, I find the beauty of Christmas cards from around the world make me smile in their color, sparkle, design, and different languages. Some are elegant, others sparkly, some are celebrating winter and snowflakes, while others show off all the traditions of the holidays. Every year, I carefully pick out or make my cards and try to get them out the first week of December. And then.. the waiting begins. I practically stand at the door every day (hurry up postman!) waiting for the colorful envelopes. After all, no other time of year does the mail from my friends and family come in droves – out weighing the bills. (Who likes bills?!?).

Once they arrive, I carefully open each one, basking in the joy of the card (it’s like a little gift in each one) and then put it on the mantle or tape it up to the walls in a lovely display. When Christmas is over, I save each card – and try to find unique creative things to do with them later. It’s a great way to Upcycle, be eco-friendly, and keep memories intact from year to year.

Untitled

This year, I didn’t have much money for decorating my flat. I’d spent most of my savings on medical bills, and that meant that not only was I trying to do handmade items for Christmas (I had time – not money) for everyone, I had to find a unique way to decorate. This is what I came up with. A simple re-purposed series of Christmas cards that were a bit folksy, eco-friendly, and totally made me smile every time I saw them hanging across my mantle.

Here’s how I did it, so you can make your own Recycled Christmas Card Bunting.

Untitled

    Materials:

  • Old Christmas Cards
  • Round template – I used the top off of a Pringles Can
  • Oval Template – I used an old Scrapbooking shape
  • Scissors
  • Craft glue
  • Hole punch
  • Ribbon or String

    Untitled

      Steps:

    Step 1: Take your circle or template and move it around on the card until you find a place you’re happy with. Depending on the card, you may be able to get two circles or ovals per card.

    Untitled

    Step 2: Trace around the template and then cut out the shape. Repeat for each of your cards. Try to get an even number of similar theme or similar looking cards. Don’t forget that you may be able to use the inside wording from the card or back of the card may have pictures too!

    Untitled

    Step 3: For double sided cards, match similar cards together – eg. The two snowmen on the far left came from the same card and look nice front / back. Add glue to the reverse of one of the rounds, taking note of which way is “up”.

    Untitled

    Step 4: Attach the round to the other selection, again, being careful that they are both in the correct direction when looked at on the front and back.

    Untitled

    Step 5: Squeeze out excess glue, wipe it off, and then weight the round with a book for a while until the glue sets. Wait for the glue to dry.

    Untitled

    Step 6: Once the glue is dry, punch 2 holes in the top of each card.

    Untitled

    Step 7: Thread the ribbon through the card, making a center and trying to balance the size / shape / color on each side of the bunting.

    Untitled

    Untitled

    Step 8: Hang up across your mantle, on your wall, or anywhere else where you want the display.


    Untitled

    A few other things you can do with the same technique – just punch fewer holes –

    Christmas Ornaments
    Mobiles to hang from ceiling
    Why not make a Rectangle from a card – and hang several different size rounds down from it like raindrops from a cloud
    Add some mod-podge and make necklaces
    Attach some flower wire and make centerpieces for the table

    What else can you think of? Share your ideas and how this turned out for you – I’d love to see it!

    Share
  • 12 weeks ’till Santa Comes

    Rudolf packages after snow

    Can you believe it!?! It is only 12 weeks until Santa comes and the rush is on. I’ve set a goal for myself that I will try to hand make as many of my gifts as possible. Not only may it be less expensive, and I get to use some of my talents, but it also will be more customizable to each person that I want to give a gift.

    So, what am I doing?

    Crochet – scarves, bracelets, etc.
    Jewelry – stringing some beads into necklaces
    Sewing – making tea towel aprons, pillows, etc.
    Paper crafts – think stationary, cards, etc.
    Pottery / ceramics – painting some fun pieces of pottery to give as gifts

    In the last couple of months, I’ve had a class in sewing for a machine and learned to use a sewing machine. Over the weekend, I found a place to let me use the pottery wheel and also to paint some pre-formed ceramics for a reasonable price. They’ll fire it and glaze it, and after a couple of weeks, you get it back – perfect for gift giving and/or keeping for myself.

    Luckily my Christmas gift list isn’t too long, and in 12 weeks, theoretically, if I plan everything right, I should have enough time to complete what I want to.

    I want to point a few great sites that I’m using for inspiration –

    Crochet me – Fabulous site with lots of free and paid crochet patterns. They have a great magazine for crochet called Interweave crochet that I’m subscribed to and have learned some new stitches from.

    Ravelry – They’re a knitting and crochet community and they have several project ideas and free patterns that are available for everything from hats and scarves to afghans, sweaters, and more.

    Craftsy – what can I say other than I love this site. I’m not a “single item” crafter. I’m more of a Jill-of-all-trades where I find that one piece of something can influence another of the many projects that I have going or would like to try. This site has a little bit of the crochet/knitting, but also has sewing projects, paper crafts, jewelry, and so on.

    Crafts Beautiful – this is a magazine that gives away free crafting items (who doesn’t love that) once a month. They have a little bit of everything – and while I don’t always like everything, it really gets my creative juices flowing. The latest magazine that I bought had a bunch of Christmas themed papers – perfect for the holiday cards.

    Pinterest – photos galore. Everything from beginning to end from colors to jokes, to patterns that are linked from what others have done.

    CreateForLess – repository for lots of craft supplies that are reasonably priced. They also have craft ideas, and they tend to keep me within budget on whatever I want.

    Wish me luck, and expect more posts with some of the finished projects coming soon.

    Share