Tea dish towels to Throw Pillow in an Afternoon

From Tea towel to Throw pillow in an afternoon....

Not so long ago, I was in Ikea. Now one of the coolest things about Ikea is that they have some great “line art” designs in both fabric and modern design. While I was there, they had some beautiful tea towels (hand towels) for sale. They were simplistic trees with nice retro colored leaves in browns, yellows, blues and burgundy. It reminded me of something out of the 1970’s.

From Tea towel to throw pillow in an afternoon...

The thing is that as good heavy cotton fabric, I thought they were just too pretty to take out and use as tea towels / dish towels. So, after a couple days of thinking about it, I pulled them out of the bag and ironed them flat. I decided that they would make great throw pillow covers.

Thus began the remake. I measured out the length of the pillows and cut some light tan (actually recycled from old sheets) fabric that I had saved. It came up just about 2/3 of the way on the towel itself. I then sewed it with french seams (front side to front side – sew, turn inside out and sew) around the edges:

From Tea towel to Throw pillow in an afternoon....

Then, I attached 2 buttons on the reverse of a couple pillows, before deciding that I liked the velcro look better for the other two. Inserting the pillow I already had from the sofas – the total time spent was an afternoon for 4 pillow covers that can be washed, removed, and are totally match my decor.

From Tea towel to Throw pillow in an afternoon....

How sweet are these little “tree of life” throw pillows from a cotton towel? And the best part? It cost me about 2 Euro a pillow.

Share

Making Bibs

Bibs for Orliath

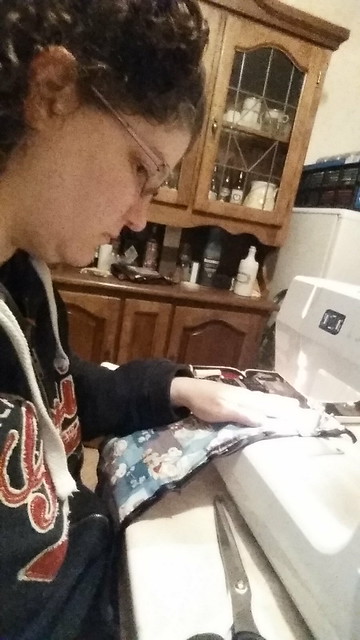
Over the weekend, I dug out the sewing machine. The funny thing is that I often get asked about ‘fixing’ things using my sewing machine, and the only time that I ever do get out the machine is if someone else asks me to do something for them. I’m not the world’s best at sewing, nor am I very fast at it. To be honest, it is my least favorite “crafty” thing to do, but if I have to I can do it. The result is that when the machine is out (about once every 6-8 months) I go through and “binge sew” on it – to repair everything that needs reparing, make what needs making, and then call it good. I then pack up the machine and it doesn’t see the light of day for another 6-8 months.

Bibs for Orliath

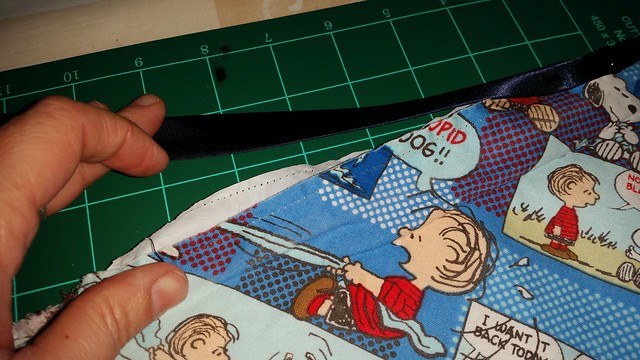
This time, I was asked to repair 4 bibs for Orliath, a gorgeous little girl who wears bibs daily. Sadly, she is confined to a wheelchair, and when I got the bibs, I ended up having to take them apart and remove the binding / ties and then re-sew and replace the binding. You see, the bibs that I was asked to repair are basically 2 pieces of poplin (cotton) fabric with a thin piece of plastic in between (they crinkle when they’re moved).

Bibs for Orliath

They were sewn with a single stitch on two fold binding tape around the outside edge. The end result was that they came apart after only a (relatively) few washings as the fabric shrank / stretched. It’s quite time consuming and challenging for me – with my limited patience and sewing experience.

Bibs for Orliath

After getting frustrated, I chatted to my mom, dad, and grandma (dad and grandma make quilts) and I posed the problem to them. They told me that it might be faster to make the bibs brand new – and sewn at least twice – once on the inside fabric pieces with a single stitch, and the other with zig zag stitch on the double sided bias tape to effectively give it 3 levels of stitching to “hold”. Once I had the concept – I decided that I could cut a bunch of fabric, and then properly put them together so that they’d need fewer repairs in the future. With the right fabric, I could also give something that’s waterproof and easy to clean – but also soft and not so noisy.

Bibs for Orliath

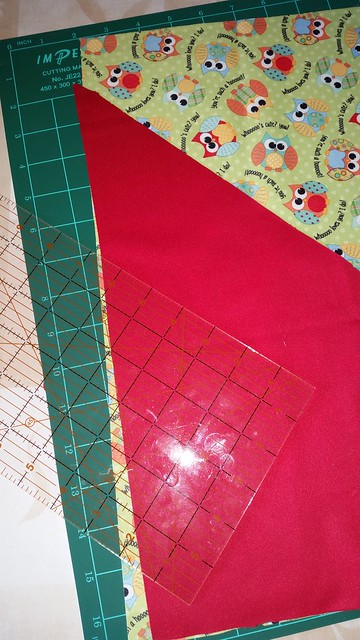
And so it began. I looked on eBay, and found something called PUL fabric – PUL stands for Polyurethane Laminate fabric – and the polyurethane is bound with soft t-shirt and microfiber (to eliminate the “crinkle noise) using an eco friendly adhesive. From here, I decided to try my hand at “creation” using the old bibs as an example. Using the old bibs as a “template” for size (you can see the red piece from one of the bibs I took apart), I started cutting out multiple triangles.

Bibs for Orliath

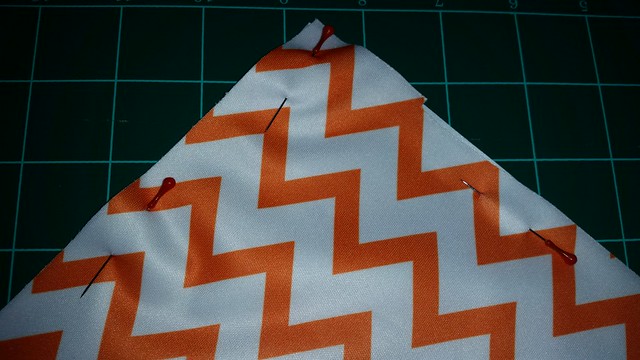
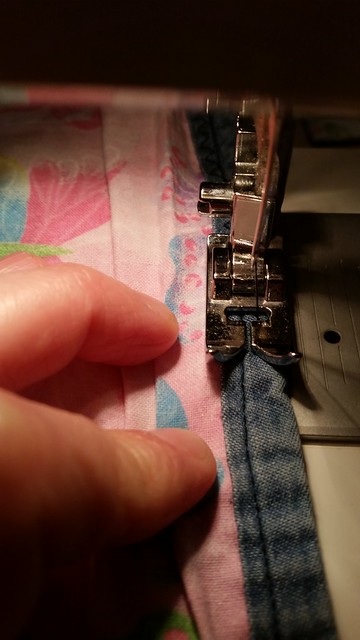
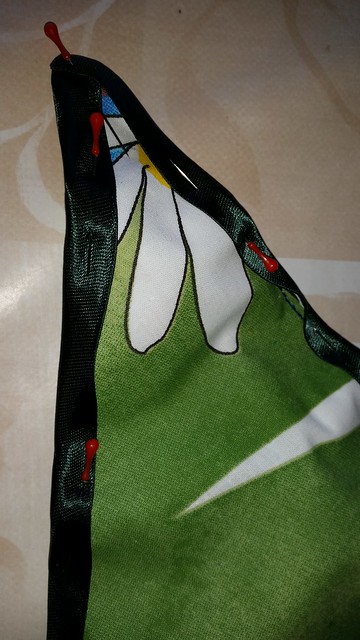
Then, I pinned and sewed the wrong sides together along the edges.

Bibs for Orliath

Bibs for Orliath

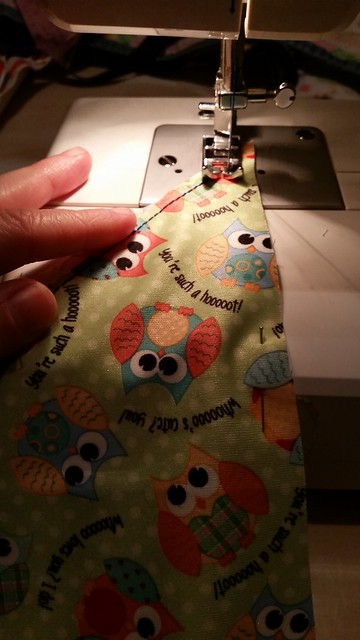
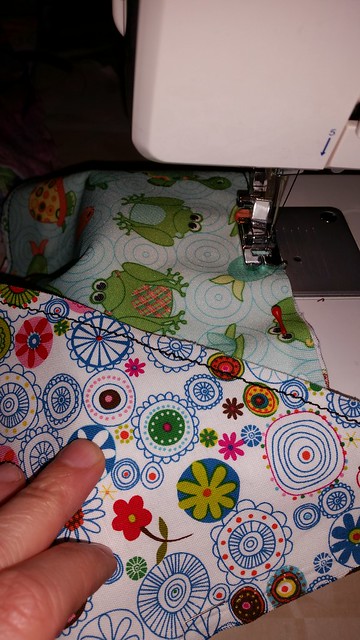
Trimming the excess fabric edges, I then pinned on the satin bias tape and made corners. Now, I went back and did the zig zag stitch over the edges.

Bibs for Orliath

Bibs for Orliath

The end result I think turned out pretty well in my opinion – Orliath ended out with 4 repaired bibs (top of the picture and 5 new bibs from scratch. They’re not perfect (I still have trouble sewing straight seams and keeping the bias tape even on both sides) but they will hold up to washing, chewing, and food – and that’s what counts.

Bibs for Orliath

Share

Leftover yarn.. what to do?

After making a few projects in the last few weeks, I had some leftover yarn. There was too much left to want to throw it away, and too little left to do something big and complicated with. Dilemma – what to do with my leftover yarn?

Thank goodness for pintrest.

On Pintrest, I found lots of small projects – everything from applique birds and other creatures that can be attached to other crochet projects – to mini granny squares that you just save forever until you can sew them together. The best, however, was a pattern for a cup / mug / beer cozy. As a coffee drinker this was the perfect idea for me, and so I started with a granny square.

Untitled

Once the square was the height / width I wanted, I then started working on one side – and then the other until it made it around the mug.

Untitled

Finally, I made a long tie – and wove it through the back “shoelace” style.

Untitled

Here’s what the finished product looks like – on the cup:

Fabulous colors of Orange and Blue for my adjustable cup / coffee mug /beer cozy. Order one for your favorite fan today!  https://www.etsy.com/ie/shop/PhoenixRoseDesign  #auburn #blue #orange #crochet #custom #etsy #PhoenixRoseDesign #handmade #followme

Not bad for a little bit of left over yarn and about 20 minutes time. I think I’ll have to make a few more as gifts – because I know several football lovers who would appreciate these in their team colors!

Share