Hen Party Shirt crafts

As some of you know, my friend J. is getting married soon. We recently held a little hen party here for her in Dublin – nothing very big, but dinner and a bit of dancing. Then, we had the proper “big” party in York (more about that later).

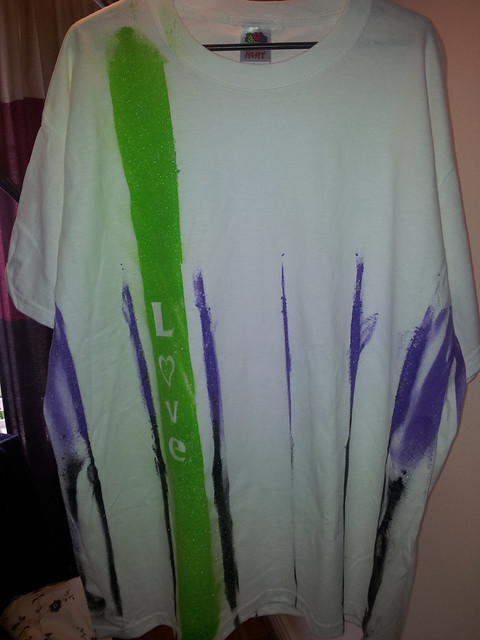
In preparation for the batchelorette party weekend, I thought it would be fun to have t-shirts. After pricing several places on line for “standardized” hen party t shirts, I was shocked to see that they were all either black & pink or white & pink – and quite expensive at about 10 – 12 Euros each (about 150 euro). Thus, I decided to make my own for the 15 girls with some plain t-shirts (5 euros each) and some spray fabric paints in the 3 colors that Jacqui loves best – lime green, violet, and silver.

I got the fabric spray paints from a site called as a set of 6 colors for 34.00. I also got a couple of stencils. Add in my time over the course of two evenings – and I had a mini sweatshop going in my living room.

First, I read the instructions, and tried a few tie dye style shirts – with no stencils. This involved scrunching up a few of the shirts in various ways – and spraying colors across them. The results turned out quite cute:

t shirts for Jacqui's hen night


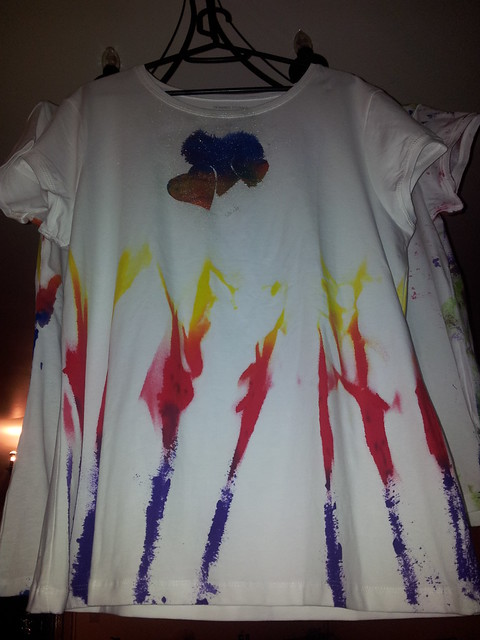
Then, I decided to try the tie dye look with a few sample stencils – like “princess”, “hearts”, and “angel”. This worked ok for some, but I found that if I was impatient removing the stencils, the paint ran. If I waited too long, the stencils stuck. The key was being spot on with removing them at just the right time – when the paint was tacky, but before it was too dry.

t shirts for Jacqui's hen night

t shirts for Jacqui's hen night

As time went on, I got the timing better – and figured out how to get the stencils to work even better – realizing that you had to put on the light colors and gradually add the dark ones so that they worked best.

t shirts for Jacqui's hen night

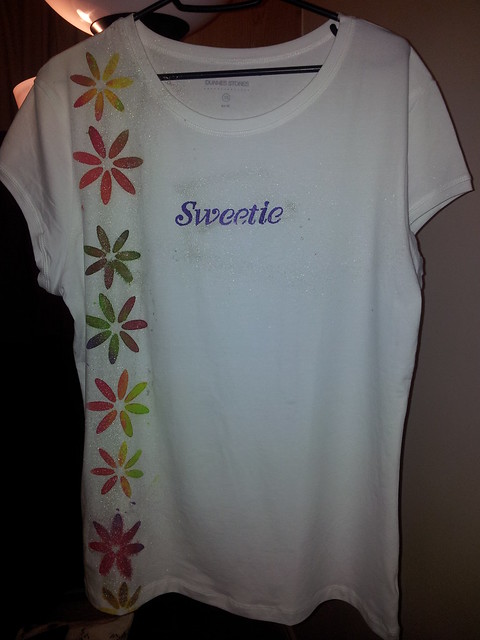
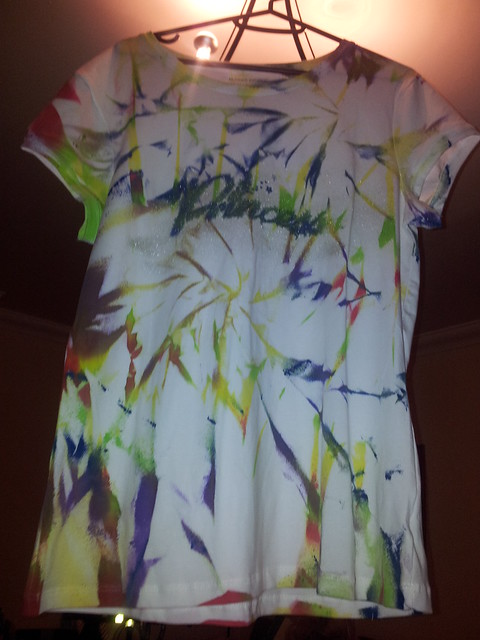
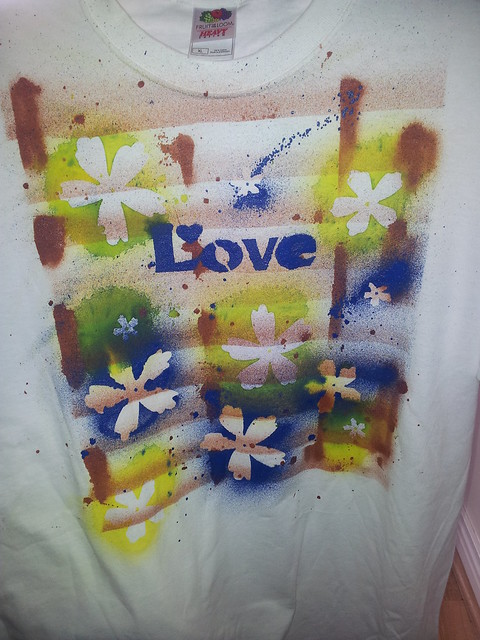
Finally, I felt comfortable enough that I could actually use some airbrush/spray paint techniques – and actually did a “brick” style layout using some old cardboard to make “stripes” and short lines. Then, waited for it to get to mostly dry. Next, I laid out a stencil for the lettering – and popped on a few flower shapes to spray around. This resulted in a couple interesting looks:

t shirts for Jacqui's hen night

t shirts for Jacqui's hen night

In the end, we didn’t use the shirts while site seeing before the main evening party as I had thought (we didn’t all arrive at the same time, and not all of us site-saw together) but I did give them to the girls as a momento of the weekend. They went over well – as the girls could choose which ones they wanted according to size. The best part was that they were all in similar colors, but they were all slightly different – which meant each person’s personality was reflected a little bit in each shirt.

A few notes – the total ended up being 120 for the shirts had I purchased them pre-made. For these, I spent 110 and my time. I do however have the stencils and spray paints left – only 2 cans having run out after having made a total of 18 shirts. I’m planning on using the fabric spray and stencils on some pillowcases, a couple pairs of jeans, and have some other ideas as well. I think for the cost the project was quite worth it – especially because of the leftover paints.

I actually think this could / would be quite a fun thing for an older child’s birthday party. They can make their own “spray paint” tie dye t shirts quickly and easily out in the back garden – and let them dry for 30 minutes while you sit down to have cake and gifts / play some party games. It’d be a fun addition to the goodie bags and a really neat keepsake if you have kids who love crafts.

Share

Sewing Class

Well, I did it. I finally broke down and bought a voucher to learn to sew with a sewing machine. The funny thing is that I’m not quite sure how I managed to make it for 30 something years without actually learning to use a sewing machine – my mom, dad, grandma, and great grandma all make quilts, clothes and so on. Somehow, however, when it came right down to my learning how to do this, I quite simply didn’t.

Mom would say it wasn’t for lack of trying. I can remember her offering to teach me several times and me just saying no thanks. My grandma, I know she did get me seated at her machine when I was knee high to a rattle snake – we made a pillow – but I was more interested in trying to go outside and play when I was about 5 years old than I was in learning how to sew something together. Dad – when I mentioned about the class, he said I really thought you knew – didn’t you take that as a class in school?

Well, I did take a home economics class in middle school (6 weeks to cram everything in from sewing basics, to cooking basics, to how to balance a budget and a checkbook). As I recall we did learn a few basic stitches – eg. learn to sew on a button, a snap and repair a hole. We also “learned” to use a foot treadle powered sewing machine – there were 3 for 30 students – for about 20 minutes in the basic course. Let’s just say that it didn’t stick. I’m not sure if I just didn’t learn, or if I didn’t remember because I didn’t want to learn – but modern machines are quite different than this treadle powered beast of a machine which we used.

Anyhow, I decided, after seeing a pile of trousers that needed hemmed (and spending 15 Euros each to have them hemmed) that it would be a great idea to finally learn to sew. The voucher came just in time, and was a basic 3 hour course at When Poppy met Daisy to learn to use a sewing machine. Me, H, and J all decided to attend, as a “girls night out” type event. We had to each pick out our fabrics – H chose a pink print with little hearts, J chose a fabric with cats and funny social networking quotes. I chose an abstract big flower print from ikea.

Untitled

The class covered the basics – from threading the machine, to creating a bobbin and bobbin thread.

Untitled

Once we learned the basic parts of the machine, the instructor started us out sewing on a piece of lined notebook paper – both a straight stitch and a zigzag stitch. The paper, because of lines, let us learn to sew straight lines. It also helped us to judge if we were going too fast / too slow (the paper would tear) or if we needed to adjust the tension higher or lower. Brilliant idea – as it wasn’t actually messing up any fabrics.

Untitled

Once we had mastered the straight lines, we moved on to some scrap fabric – sewing a basic hem. Then we moved on to the French Hem.

Untitled

Finally, we started on our project, combining all that we had learned together. It was a makeup bag, closing with a smidge of velcro. We had 3 happy girls by the end of the class – and I think that I’ll eventually go back and learn some additional stitching – like shirt or skirt making.

Untitled

On a side note, despite the fact that it was supposed to be a makeup bag, J decided it made a better hat than a bag.

Untitled

Well, I guess that’s one way to do it!!

Share

Daisy Tea cosy

Not too long ago, I made a tea cosy for Aoife, and learned a new stitch in the process. Well, in honour of spring, I made another – for her mom.

Daisy Tea cosy for Aoife

This time, I learned to make the daisy at the top, and experimented with front loop / back loop only crochet. I think it turned out rather well, though I think if I were to choose the colors again, I’d look for a brighter yellow to go with the blue and white.

Here’s a closeup of the stitches.

Springtime Daisy tea cosy close up stitches

The free pattern for this is at:
http://www.favecrafts.com/Kitchen-Crochet/Daisy-Teapot-Cozy-Crochet-Pattern#

** Special thanks to Aoife for the picture with the teapot – since I don’t have one!**

Share